How to Grow Bottle Gourd: A Step-by-Step Guide for Beginners
Published: 22 Jul 2025
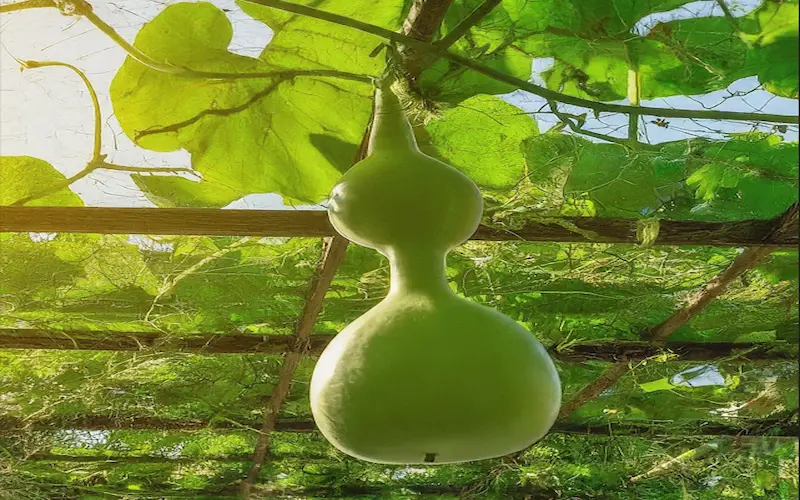
Bottle gourd (Lagenaria siceraria) is a popular vegetable grown in many parts of the world. It is known for its long, bottle-shaped fruit and is widely cultivated in home gardens and commercial farms. The plant is a fast-growing vine that thrives in warm climates, making it an excellent choice for beginners and experienced farmers alike.
One of the biggest reasons for its popularity is its nutritional value. Another key benefit is its ease of cultivation. This guide will help you understand how to successfully grow bottle gourd, covering everything from planting methods and growth stages to care tips and harvesting techniques. This step-by-step guide will make the process simple and rewarding for you
Understanding Bottle Gourd Cultivation
Bottle gourd (Lagenaria siceraria) is one of the oldest cultivated vegetables, widely grown for its edible fruits. It is a fast-growing vine that belongs to the Cucurbitaceae family, the same group as pumpkins, cucumbers, and melons. This plant is known for its ability to adapt to different growing conditions. The bottle gourd is a popular choice for home gardeners and commercial farmers.
What is Bottle Gourd?
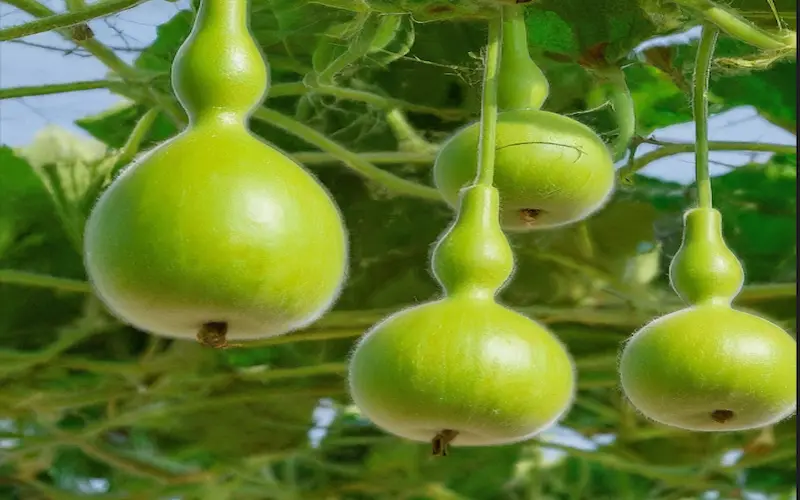
The bottle gourd is a tropical and subtropical vine that produces long, cylindrical, or bottle-shaped fruits. It is commonly cultivated for its tender, green fruits, which are used in various dishes worldwide. The plant has large green leaves, yellow flowers, and strong climbing tendrils, requiring support for better growth.
Varieties of Bottle Gourd
Bottle gourds have different shapes and sizes, and their varieties can be categorized into:
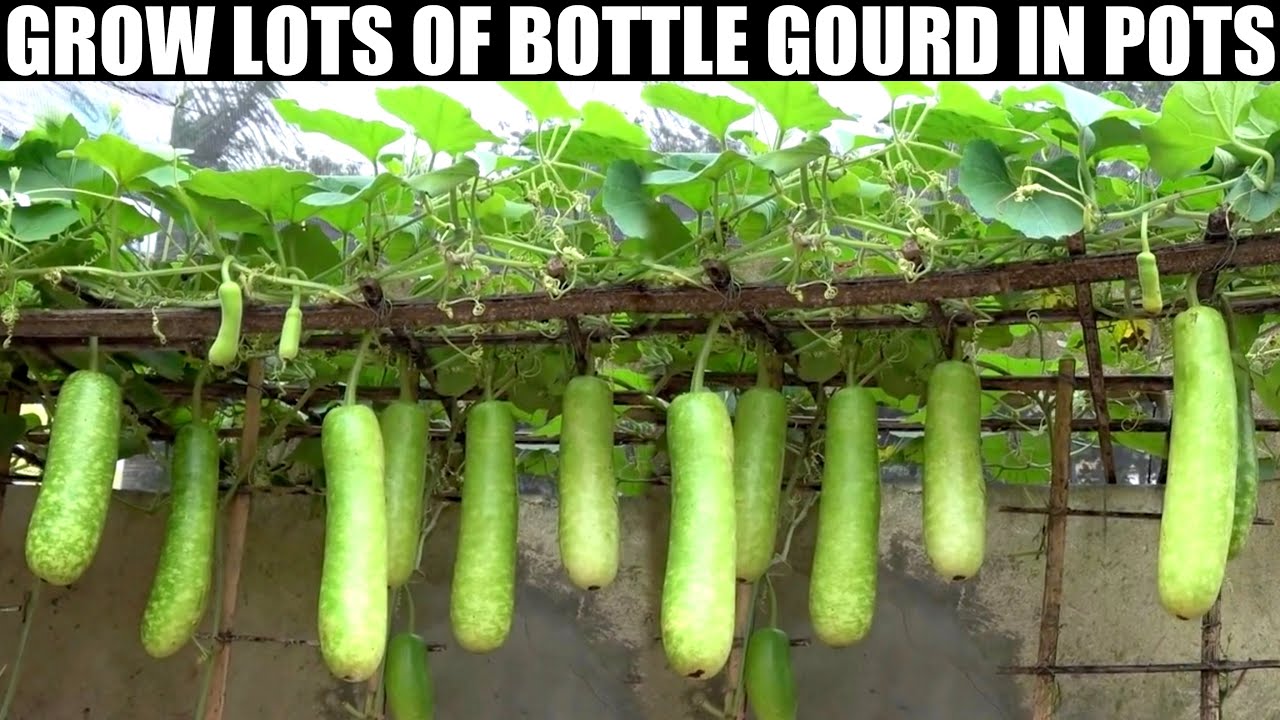
- Long Bottle Gourd: Cylindrical, elongated shape, commonly grown in home gardens.
- Round Bottle Gourd: Short and spherical, popular in certain culinary uses.
- Hybrid Varieties: Improved for disease resistance, high yield, and faster growth.
Common Names of Bottle Gourd in Different Regions
The bottle gourd is known by different names around the world.
- India: Lauki, Doodhi
- Pakistan: Ghiya
- China: Hu Lu
- Africa: Calabash
- USA & UK: Bottle Gourd
- Indonesia & Malaysia: Labu Air
This vegetable is widely appreciated for its culinary versatility and health benefits, making it an essential crop in many regions.
Climate & Soil Requirements
To grow bottle gourd successfully, it’s important to understand the ideal climate and soil conditions needed for healthy plant growth.
Climate Requirements
Bottle gourd thrives in warm and humid climates. It is a summer crop that requires:
The ideal temperature for bottle gourd cultivation is 25–35°C. Growth slows down in temperatures below 20°C, and frost can severely damage the plant.
Moderate rainfall is beneficial, but excess water can cause fungal diseases. A humidity level of 50–70% is ideal.
In tropical and subtropical regions, bottle gourd can be grown year-round. In cooler areas, it is best planted in spring or early summer.
Soil Requirements
Bottle gourd is adaptable to various soil types, but well-drained, fertile soil ensures the best growth. Here are the ideal soil conditions:
Soil Type: Loamy or sandy loam soil rich in organic matter is best. Avoid heavy clay soil, as it retains too much moisture.
Soil pH: The optimal pH range for bottle gourd is 6.0–7.5 (slightly acidic to neutral). Highly acidic or alkaline soil can lead to poor nutrient absorption.
Drainage: The soil should be well-drained to prevent root rot. Raised beds or ridges can help improve drainage.
Fertility: Adding organic compost or well-rotted manure before planting enriches the soil and promotes strong vine growth.
Sunlight Requirements
Full Sun Exposure: Bottle gourd requires at least 6–8 hours of direct sunlight daily. Insufficient sunlight can lead to weak vines and fewer fruits. With the right climate and soil conditions, bottle gourd plants grow vigorously and produce high yields. Understanding these requirements is the first step toward successful cultivation.
How to Plant Bottle Gourd
Bottle gourd is an easy-to-grow vegetable that thrives in warm climates with proper care. Successful planting begins with selecting quality seeds, using the right sowing methods, and ensuring the correct spacing and depth for optimal growth. Let’s break down each step in detail.
Seed Selection & Preparation
Selecting the right seeds is crucial for achieving high yields and disease resistance. The quality of seeds directly affects the germination rate, plant health, and fruit production.
Choosing High-Yielding and Disease-Resistant Seeds
Hybrid vs. Open-Pollinated Seeds:
- Hybrid Seeds: Developed for better disease resistance and higher yields. Ideal for commercial farming.
- Open-Pollinated Seeds: Traditional varieties that can be saved and replanted but may have lower disease resistance.
Certified Seeds: Always purchase seeds from a trusted agricultural supplier to ensure good germination rates and quality.
✅ Disease Resistance: Look for varieties resistant to powdery mildew, downy mildew, and bacterial wilt to reduce crop losses.
Pre-Soaking or Scarification for Better Germination
Bottle gourd seeds have a hard outer shell, which can delay germination. To speed up the process, use these techniques:
Pre-Soaking: Soak seeds in warm water (50°C) for 12–24 hours before planting. This softens the seed coat and encourages faster sprouting.
Scarification: Lightly scratch or file the seed coat to allow moisture absorption. This helps break dormancy and improves germination rates.
Using a Wet Cloth: Wrap seeds in a damp cloth and keep them in a warm place for 24–48 hours before sowing. This method is helpful in colder climates.
Sowing Methods
There are two common ways to plant bottle gourd: direct sowing and nursery transplantation. The choice depends on the climate, growing conditions, and farmer preference.
Direct Sowing (Recommended for Home Gardens & Large Farms)
Best suited for warm regions where the soil temperature is above 25°C.
Seeds are sown directly in the prepared field or garden bed.
Germination takes 7–10 days, depending on temperature and moisture levels.
Nursery Transplantation (Ideal for Cold Climates & Early Crops)
Seeds are sown in seed trays or nursery beds and transplanted when seedlings reach 3–4 weeks old.
Protects young plants from pests and harsh weather before transplanting.
Helps in early harvesting as seedlings establish quickly.
Best Planting Time Based on Climate
Tropical & Subtropical Regions: Bottle gourd can be grown year-round, but the best seasons are spring (February–April) and monsoon (June–August).
Temperate Regions: The best planting time is late spring to early summer when temperatures stay above 20°C.
Winter Planting: Possible in greenhouses or under plastic tunnels to maintain warmth.
Spacing & Planting Depth
Proper spacing and planting depth are essential for healthy root and vine growth. Overcrowding leads to poor air circulation and increases the risk of diseases and pest attacks.
Recommended Spacing for Bottle Gourd
Row-to-Row Distance: 5–6 feet apart to allow for vine spreading.
Plant-to-Plant Distance: 2–3 feet apart to avoid overcrowding.
Trellising: If growing on a trellis or vertical support, space plants 1.5–2 feet apart to maximize airflow and sunlight exposure.
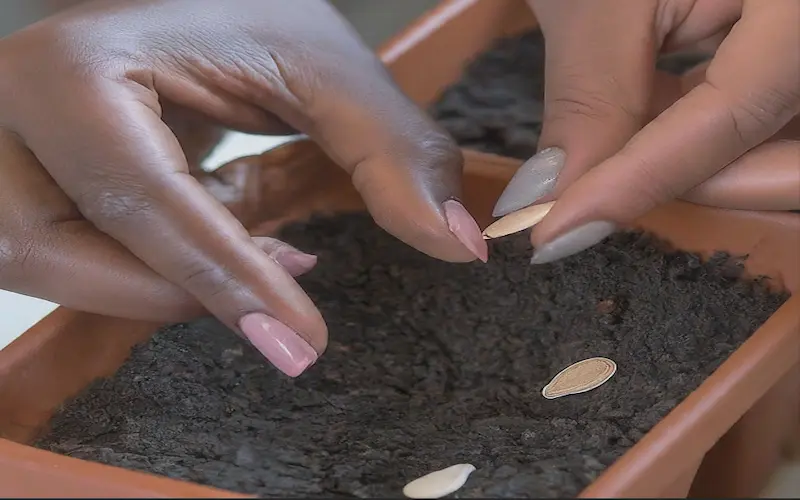
Sowing Depth for Seeds
Depth: Sow seeds 1–1.5 inches deep in moist soil.
Mulching: Cover the soil with dry leaves or straw to retain moisture and prevent weed growth.
Watering: Provide light watering after sowing to keep the soil moist but not waterlogged.
Quick Tips for Successful Planting
✔️ Use organic compost or farmyard manure to enrich the soil before planting.
✔️ Avoid over-watering, as it may cause seed rot or fungal infections.
✔️ If growing in pots, use large containers (at least 12 inches deep) for proper root growth.
✔️ Apply natural pesticides like neem oil to protect young seedlings from pests. By following these planting guidelines, you will set up your bottle gourd crop for healthy growth and high yields.
Bottle Gourd Plant Lifespan
The bottle gourd has several growth stages, from sowing to maturity. Understanding each stage helps in providing proper care to ensure a healthy plant, high yield, and disease-free cultivation. Let’s break down the five main growth stages of the bottle gourd plant.
Germination (7–10 Days)
The germination stage begins when the seed absorbs moisture and starts sprouting.
How to Identify Sprouting Seeds
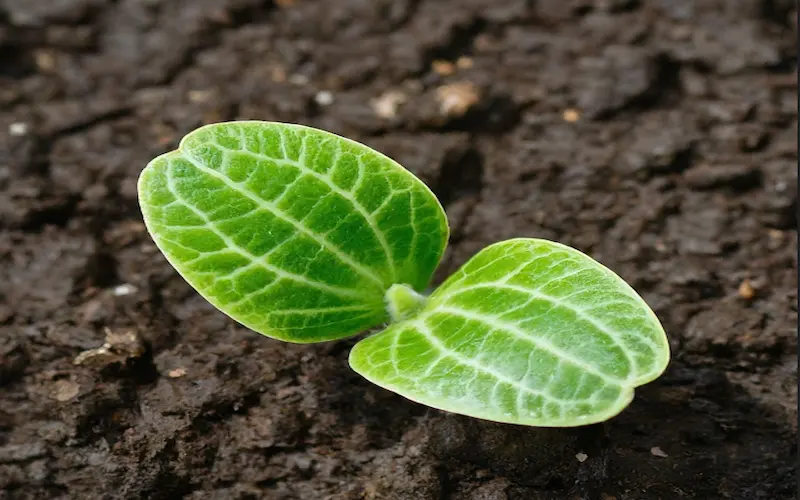
After 7–10 days, the seed coat breaks open, and a tiny root (radicle) emerges.
A small green shoot (cotyledon) pushes through the soil.
The first two leaves, called seed leaves, appear.

Common Germination Problems & How to Prevent Them
Damping-Off Disease: A fungal infection causing young seedlings to rot at the base.
Prevention: Avoid overwatering and ensure proper soil drainage. Use well-drained soil and treat seeds with fungicides before sowing.
Poor Germination Rate: Seeds fail to sprout due to hard seed coats or low soil temperature.
Prevention: Pre-soak seeds for 12–24 hours and ensure a temperature above 25°C.
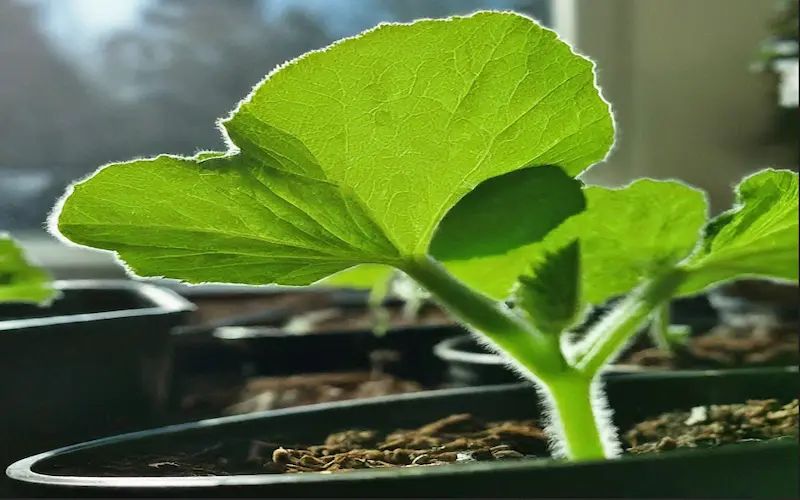
Seedling Stage (2–3 Weeks)
After the germination stage, the seedling stage begins. This is a period when young plants develop their first set of true leaves.
Key Care Tips for Healthy Seedlings
Sunlight: Provide 6–8 hours of direct sunlight daily for strong stems.
Watering: Keep soil moist but not soggy to prevent root rot.
Thinning: Remove weaker seedlings, keeping the strongest plant per spot.
Common Issue:
Leggy Seedlings (Tall & Weak Growth) – Occurs due to low sunlight. Place seedlings in a sunny area or under grow lights.
Vegetative Growth (4–6 Weeks)
During this phase, bottle gourd plants develop large green leaves, long vines, and strong roots. The plant focuses on growing foliage and stems.
- What to Expect in This Stage
- Rapid growth of stems, tendrils, and leaves.
Vines begin climbing trellises and spreading.
Formation of lateral branches to support fruiting.
Training Plants Using a Trellis for Better Yield
A trellis (vertical support) helps the plant grow upwards, reducing the risk of pests and diseases.
✔️ Install a 6–8 feet high trellis before planting.
✔️ Gently tie vines using soft strings to guide their growth.
✔️ Trellising allows better air circulation, reducing fungal infections.
🚨 Common Problem:
✔️ Yellowing Leaves: This may be due to nutrient deficiency. Apply organic compost or liquid fertilizer every two weeks.
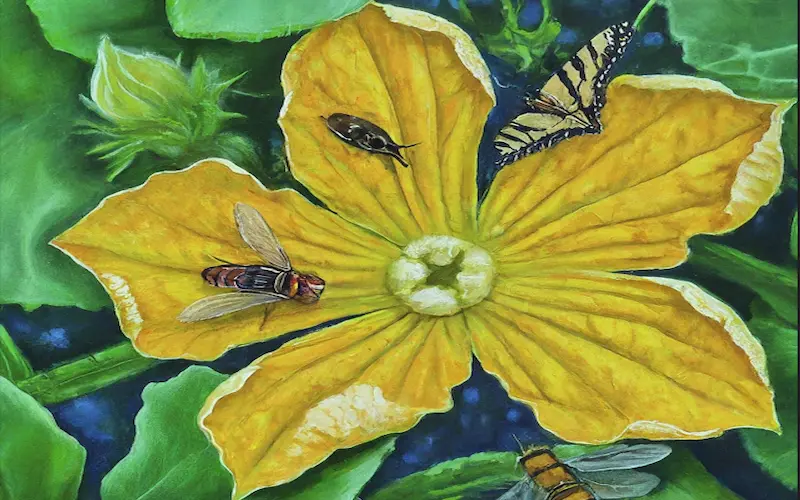
Flowering Stage (6–8 Weeks)
Bottle gourd plants produce two types of flowers: male and female. Proper pollination is necessary for fruit formation.
Identifying Male & Female Flowers
Male Flowers: Grow in clusters, have long thin stalks, and produce pollen.
Female Flowers: Have a small bottle-shaped bulge at the base, which develops into a gourd after pollination.
Hand Pollination for Better Fruit Set
If natural pollination by bees is low, you can hand-pollinate:
✔️ Early Morning Pollination: Use a soft brush to collect pollen from male flowers and transfer it to female flowers.
✔️ Increase pollination by growing flowering plants nearby (e.g., marigolds).
✔️ Avoid using pesticides that may harm pollinators like bees.
🚨 Common Issue:
✔️ Flowers Falling Off? Male flowers naturally drop after releasing pollen. If female flowers fall, it may be due to poor pollination—try hand pollination.
Fruiting & Maturity (10–12 Weeks)
After successful pollination, small bottle gourds begin to develop. The plant now directs its energy toward fruit formation.
How to Recognize Mature Bottle Gourds
Bottle gourds are ready to harvest when they reach 10–15 inches in length.
The skin turns glossy green, and the fruit feels firm when touched.
The stem at the base of the fruit starts drying slightly.

Bottle Gourd Plant Care & Maintenance
Proper care and maintenance are essential for healthy bottle gourd plants and a high yield. In this section, we will cover key aspects of watering, fertilization, pest control, and training vines to maximize growth and fruit production.
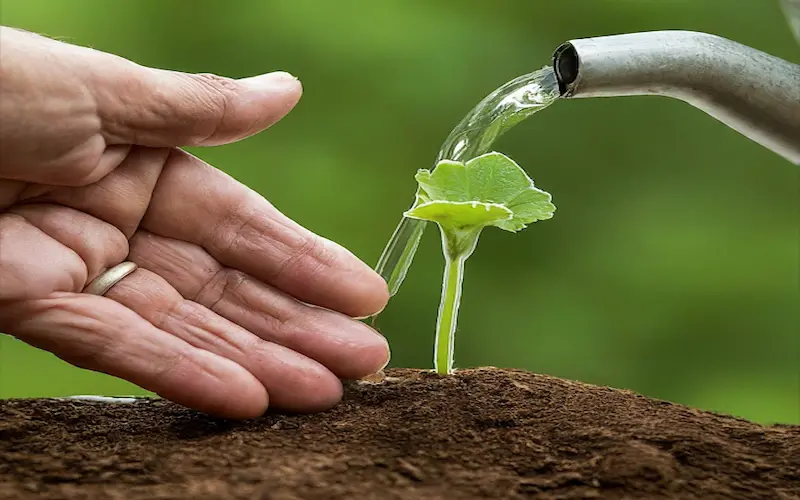
Watering Requirements
Bottle gourd plants need consistent moisture but cannot tolerate waterlogging. Deep watering helps the roots grow strong and supports fruit production.
Best Watering Practices
Deep Watering: Water deeply so that moisture reaches 6–8 inches below the surface.
Morning Irrigation: Water early in the morning to reduce evaporation.
Mulching: Use dry leaves or straw around the base to retain moisture and prevent weeds.
Drip Irrigation (Ideal for Large Farms): Delivers water directly to the roots, reducing wastage.
Watering Frequency Based on Climate
If the weather is a hot & dry climate, then Water every 1–2 days.
If the climate is moderate, then water every 3–4 days.
In the rainy season, reduce watering to prevent fungal diseases.
Sign of water stress
✔️ Wilting Leaves indicate a lack of water. Water it immediately.
✔️ Yellow leaves & root rot are caused by overwatering. Ensure proper drainage.
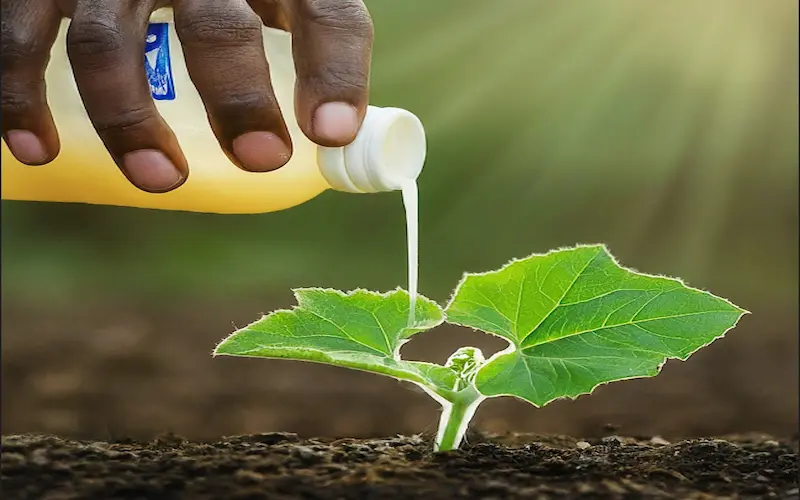
Fertilization & Nutrient Management
Bottle gourd plants require a balanced supply of nutrients at different growth stages. A combination of organic and chemical fertilizers ensures healthy plant growth and high fruit yield.
Best Fertilizers for Bottle Gourd
Organic Fertilizers:
- Compost or Cow Dung Manure. It improves soil structure and provides slow-release nutrients.
- Bone Meal & Neem Cake. It enhances root development and controls soil pests.
Chemical Fertilizers (Use Moderately):
- NPK 10-10-10 (Nitrogen-Phosphorus-Potassium): It encourages overall growth.
- Urea (Nitrogen-Rich): It boosts leafy growth in the vegetative stage.
- Superphosphate (Phosphorus): It supports strong root and flower formation.
Fertilizer Schedule for Different Growth Stages
| Growth Stage | Recommended Fertilizer & Application |
| Seedling (0–3 Weeks) | Apply compost or cow dung manure to enrich the soil. |
| Vegetative Growth (4–6 Weeks) | Use NPK (10-10-10) or well-decomposed organic manure. |
| Flowering Stage (6–8 Weeks) | Apply phosphorus & potassium-rich fertilizer to improve flowering. |
| Fruiting Stage (8–12 Weeks & Beyond) | Use liquid compost tea or bone meal every 2 weeks for better fruit development. |
🚨 Common Fertilization Mistakes:
✔️ Overuse of Nitrogen: Leads to excessive vine growth but fewer fruits.
✔️ Skipping Potassium & Phosphorus Results in poor flowering and weak fruits.
Pest & Disease Control
Bottle gourd plants are prone to pest attacks and fungal infections. Regular monitoring and organic treatments help in preventing severe damage

Common Pests & Organic Control Methods
| Pest | Symptoms | Organic Control |
| Aphids 🐜 | Sticky leaves, curling edges | Spray neem oil (5 ml per liter of water). |
| Fruit Flies 🦟 | Fruits develop holes and rot | Use yellow sticky traps, remove infected fruits. |
| Spider Mites 🕷️ | Tiny webbing on leaves | Spray soap water or garlic extract. |
| Whiteflies 🌿 | Sucking sap from leaves | Use neem oil or introduce ladybugs. |
Common Diseases & Prevention
| Disease | Symptoms | Prevention |
| Powdery Mildew | White powdery coating on leaves | Improve air circulation, spray milk & water solution (1:9 ratio). |
| Downy Mildew | Yellow patches on leaves | Use disease-resistant seeds, and remove affected plants. |
| Bacterial Wilt | Sudden wilting of vines | Use disease-resistant seeds, remove affected plants. |
| Anthracnose | Dark spots on leaves & fruits | Spray Bordeaux mixture (copper sulfate + lime). |
Supporting & Training the Vines
Since bottle gourd is a climbing plant, proper support and pruning improve plant health and yield.
Using Trellises or Stakes for Better Air Circulation
✅ Install a 6–8 feet high trellis to train the vines.
✅ Allow vines to climb vertically for better airflow and disease prevention.
✅ Use soft ties (cloth strips) to attach vines gently.
🚨 Why Use a Trellis?
✔️ Prevents fruits from touching the ground, reducing pest attacks.
✔️ Promotes straight, evenly shaped gourds.
✔️ Saves space in small gardens.
Pruning Tips to Improve Fruit Production
✅ Remove side shoots & weak vines to direct energy toward fruiting.
✅ Cut off old or infected leaves to improve air circulation.
✅ Once 4–5 healthy fruits have formed, pinch off excess flowers to focus plant energy on fruit development.
🚨 Common Mistake:
✔️ Over-pruning can reduce flowering—only remove excess and damaged growth.
Harvesting & Post-Harvest Handling
Proper harvesting and post-harvest handling ensure better quality, longer shelf life, and improved market value of bottle gourds. Timely harvesting helps in continuous production, while proper storage and usage maximize the benefits of this nutritious vegetable.
When & How to Harvest
Bottle gourds should be harvested at the right stage of maturity to ensure the best taste and texture. Picking them too early results in small, underdeveloped fruits, while delayed harvesting can lead to hard, fibrous gourds.
Most varieties reach 10–18 inches (25–45 cm) in length when ready for harvest.
The skin should be smooth, shiny, and light green. A rough, hard, or yellowish surface indicates over-ripeness.
Press the gourd lightly—if it feels firm but not too hard, it’s ready to harvest.
A mature bottle gourd has a firm, green stem. A drying or browning stem indicates the fruit is overripe.
Best Harvesting Tools & Techniques
To avoid damaging the vine and fruit, use sharp tools and follow these harvesting tips:
Recommended Tools
- Use a sharp Knife for clean cuts without damaging the plant.
- Garden Shears are Ideal for cutting thicker stems.
- Hand-picking is best for small, tender gourds (twist gently to detach).
How to Harvest Properly
- Use a sharp knife or shears to cut the stem 1–2 inches (2.5–5 cm) above the fruit.
- Avoid pulling the gourd by hand, as this can damage the vine.
- Handle the harvested gourds gently to prevent bruising.
- Harvest regularly (every 2–3 days) to encourage more fruit production.
Storing & Using Bottle Gourds
Proper Storage Methods to Extend Shelf Life
Proper storage helps retain freshness and nutritional value for a longer period.
Short-Term Storage (Fresh Use)
- Keep in a cool, dry place away from direct sunlight.
- Store in the vegetable crisper of the refrigerator.
- Wrap in paper or perforated plastic bags to maintain moisture.
- Fresh bottle gourds can last 10–14 days in the refrigerator.
Long-Term Storage (Preserving for Future Use)
For those looking to store bottle gourds beyond a few weeks, here are some methods:
Freezing:
- Peel and cut into pieces.
- Blanch in boiling water for 2–3 minutes, then cool immediately in ice water.
- Store in airtight freezer bags—lasts up to 6 months.
Drying:
- Cut the gourd into thin slices and sun-dry or use a dehydrator.
Store in airtight containers for use in soups and stews.
Common Problems & Solutions In Bottle Gourd Farming
Growing bottle gourd is relatively easy, but farmers and home gardeners often encounter germination issues, flower drop, and poor fruit quality. Understanding the causes and solutions can help improve plant health and maximize yield.
Poor Germination: Reasons & Fixes
Why Seeds Fail to Germinate?
Several factors can lead to poor germination in bottle gourd:
❌ Old or Poor-Quality Seeds lose viability over time.
❌ Hard Seed Coat delays water absorption and sprouting.
❌ Cold soil temperature (<20°C) slows germination.
❌ Overwatering or Underwatering affects seed health and growth.
❌ Fungal Diseases (Damping-Off) cause Seedlings to rot before emerging.
How to Fix Poor Germination?
✅ Use fresh, disease-free seeds from a trusted supplier.
✅ Soak seeds in warm water for 8–12 hours or rub gently with sandpaper to improve water absorption.
✅ Maintain a soil temperature of 25–35°C for best germination rates.
✅ Use Well-Draining Soil and avoid waterlogging by using loose, loamy soil with good aeration.
✅ Treat seeds with organic fungicides like neem extract to prevent damping-off.
✅ Keep the soil moist but not soggy to avoid rot.
Flower Drop: Causes & Solutions
Bottle gourd plants produce many flowers, but excessive flower drop reduces fruit set. The main reasons are pollination issues, environmental stress, and nutrient imbalances.
Causes of Flower Drop
❌ Bottle gourd requires insect pollination, mainly by bees. Without it, female flowers drop before setting fruit.
❌ Plants produce more male flowers first, leading to natural flower drop.
❌ High temperatures (>35°C) cause wilting and flower loss.
❌ Moisture fluctuations stress the plant.
❌ Excess Nitrogen leads to excessive vine growth but poor flowering.
❌ Thrips damage flowers, causing them to fall.
How to Prevent Flower Drop?
✅ Encourage Natural Pollination. Attract bees by planting nectar-rich flowers nearby.
✅ In hand pollination, use a soft brush to transfer pollen from male to female flowers.
✅ Provide partial shade in hot climates.
✅ With consistent watering, keep the soil evenly moist but avoid overwatering.
✅ Use a phosphorus-rich fertilizer (e.g., bone meal or compost tea) to promote flowering.
✅ Spray neem oil or garlic extract to protect flowers.
Quick Troubleshooting Guide
| Problem | Cause | Solution |
| Seeds not germinating | Hard seed coat, poor soil temperature, fungal infection | Hand-pollinate, balance fertilizer, and maintain consistent watering |
| Flowers falling off | Vines are growing but no fruits | Poor pollination, excess nitrogen, and water stress |
| Small fruits | Lack of potassium, calcium, and boron | Use organic fertilizers like banana peel compost |
| Misshapen fruits | Poor pollination, heat stress | Encourage bees, provide partial shade |
| Vines are growing, but no fruits | Excess nitrogen, lack of phosphorus | Vines are growing, but no fruits |
By addressing these common problems early, you can ensure healthy bottle gourd plants with high yields.
FAQs About Bottle Gourd Lifespan
From seed to harvest, bottle gourd takes 10–12 weeks (70–90 days) to mature.
- Germination: 7–10 days
- Seedling Stage: 2–3 weeks
- Vegetative Growth (Vines Developing): 4–6 weeks
- Flowering: 6–8 weeks
Fruiting & Maturity: 10–12 weeks
Growing bottle gourds at home is easy and rewarding. Follow these steps for a successful harvest:
Step 1: Select High-Quality Seeds
- Use disease-resistant and high-yielding varieties.
- Soak seeds overnight in warm water to boost germination.
Step 2: Choose the Right Spot
- Plant in full sun (6–8 hours of sunlight daily).
- Use well-draining loamy soil (pH 6.0–7.5).
Step 3: Sow the Seeds
- Plant 1–1.5 inches deep in the soil.
- Keep 2–3 feet spacing between plants.
- Water lightly after sowing.
Step 4: Provide Support
- Bottle gourd grows best with a trellis or vertical support.
- This improves air circulation and prevents fruit rot.
Step 5: Water & Fertilize Regularly
- Water deeply but avoid overwatering.
- Feed plants organic compost or balanced fertilizer every 15 days.
Step 6: Control Pests & Diseases
- Use neem oil spray to prevent common pests.
- Remove infected leaves to stop disease spread.
Step 7: Harvest at the Right Time
- Harvest when the gourd is smooth, tender, and 10–15 inches long.
Use a sharp knife or scissors to cut without damaging the vine.
Bottle gourd needs a balanced mix of nutrients for strong vines and high yield.
✅ Best Fertilizers for Growth & Yield:
- Organic Fertilizers (Safe & Sustainable)
- Cow dung manure – Provides nitrogen for vine growth.
- Bone meal – Rich in phosphorus, promotes flowering.
- Banana peel compost – High in potassium for fruit development.
- Neem cake – Prevents soil-borne pests and diseases.
- Chemical Fertilizers (For Faster Growth)
- NPK 5-10-10 (Less nitrogen, more phosphorus & potassium).
- DAP (Di-Ammonium Phosphate) for healthy root growth.
Potash (K) improves fruit quality and size.
The best planting time depends on the climate of your region.
✅ Warm Climate Areas (Tropical & Subtropical Regions)
- Best months: February–April & June–August
- These months provide ideal temperatures (25–35°C) for fast growth.
✅ Cold Climate Areas (Temperate Regions)
- Best months: March–May & July–September
- Avoid planting in winter as cold temperatures slow down growth.
✅ Indoor or Greenhouse Cultivation: Bottle gourd can be grown year-round if kept in a temperature-controlled environment.
Bottle gourds are planted in warm soil, so March and April are the best seasons for planting bottle gourds.
You can grow a bottle gourd indoors in a pot filled with potting mix. Sow seed 1.1 inches deep and plant 3 seeds in the pot. Keep the pot in the direct light source. Also, keep the pot moist and warm.
Conclusion
The bottle gourd is an easy-to-grow, nutrient-rich vegetable that thrives in warm climates. Whether cultivated in home gardens, pots, or farms, it provides a continuous harvest with proper care. The key to successful cultivation lies in choosing the right variety, maintaining soil fertility, providing adequate water, and managing pests effectively.
Using organic fertilizers, pruning vines, and supporting the plant with trellises can significantly improve fruit yield. For beginners, bottle gourd is an excellent vegetable to grow due to its fast growth and minimal maintenance requirements. With a little effort, you can enjoy fresh, homegrown gourds that are perfect for cooking, juicing, and even traditional medicine.


- Be Respectful
- Stay Relevant
- Stay Positive
- True Feedback
- Encourage Discussion
- Avoid Spamming
- No Fake News
- Don't Copy-Paste
- No Personal Attacks
- Be Respectful
- Stay Relevant
- Stay Positive
- True Feedback
- Encourage Discussion
- Avoid Spamming
- No Fake News
- Don't Copy-Paste
- No Personal Attacks
