Collard Companion Plants : Top Tips for Gardeners
Published: 19 Feb 2025
Collard greens are a highly nutritious, leafy green vegetable. They belong to the cabbage family. They are known for their large, dark green leaves and slightly bitter, earthy flavor. They are packed with vitamins A, C, and K, fiber, and antioxidants.
Collard greens are easy to grow, making them perfect for beginner gardeners. They thrive in cool weather and can be grown in spring and fall, offering a continuous harvest if properly maintained.
In this guide, we will cover everything you need to know about growing collard greens successfully, including the best companion plants for collard greens, ideal growing conditions, growing collards from seed, growing collards in containers, and common mistakes to avoid
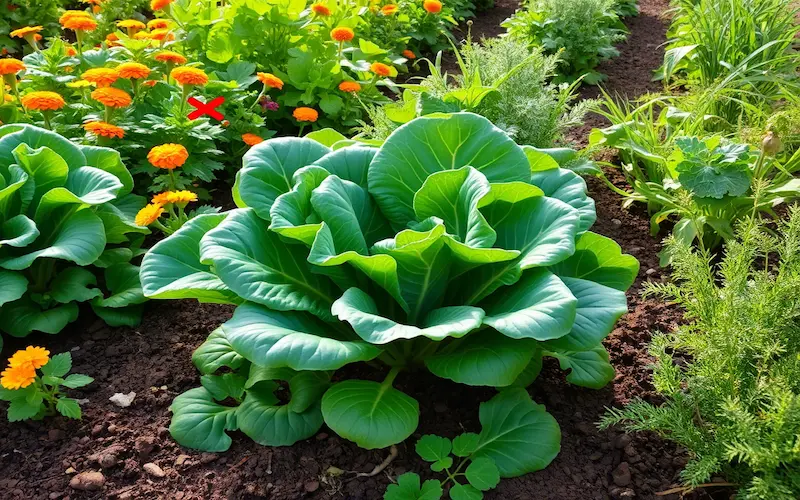
Companion Plants for Collard Greens
“Some of the best companion plants for collard greens include aromatic herbs like rosemary and thyme, which repel cabbage moths, and nitrogen-fixing legumes like bush beans to enrich the soil. Marigolds are another powerhouse partner—their bright blooms deter nematodes and aphids while attracting pollinators.
Companion planting isn’t just about pest control, though. Pairing collards with shallow-rooted crops like lettuce maximizes garden space, while taller plants like sunflowers provide shade during summer heat. (Want to explore companion strategies for other crops? Check out our guide to ginger companion plants for tips on pairing this tropical root with beneficial neighbours!) Choosing the right allies’ll boost collards’ resilience, improve soil health, and create a thriving, biodiverse garden ecosystem.”
Benefits of Companion Planting for Collard Greens
1. Natural Pest Control
Collard greens attract common garden pests like aphids, cabbage worms, flea beetles, and whiteflies. By planting some plants together, you can naturally repel these pests without the need for chemical pesticides. Some plants release strong scents that confuse or deter insects, while others attract beneficial predators that keep pest populations in check.
2. Soil Improvement
Some companion plants help improve the soil by fixing nitrogen, adding organic matter, or preventing soil erosion. Collard greens have access to the nutrients they need for healthy growth.
3. Better Space Utilization
Companion planting allows you to grow multiple crops in the same area without them competing for nutrients. For example, deep-rooted plants can be grown alongside shallow-rooted ones, ensuring efficient use of space and resources.
Good Collard Greens Companion Plants
Herbs That Repel Pests
Certain herbs make excellent companions for collard greens because they have strong scents that deter insects and pests.
Dill:
Attracts beneficial insects like ladybugs and wasps, which feed on aphids and cabbage worms.
Rosemary:
Its strong aroma helps repel cabbage moths and flea beetles.
Thyme:
Thyme is a natural repellent for cabbage worms and other pests that commonly attack collard greens.
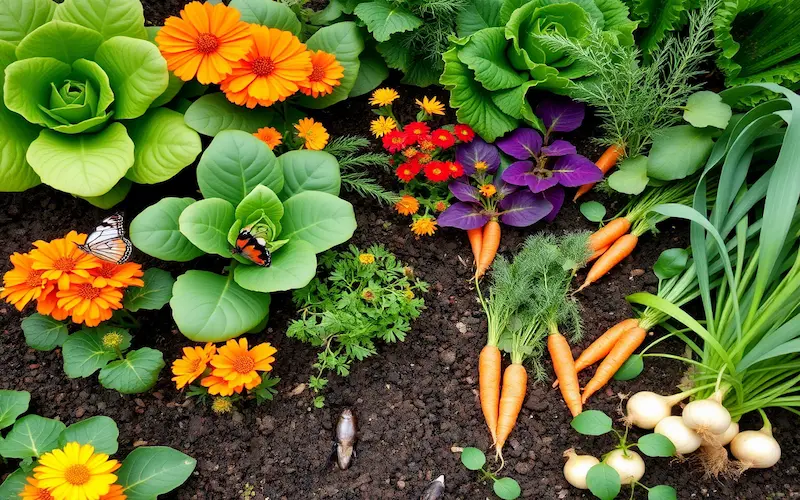
Vegetables That Grow Well with Collards
Some vegetables complement collard greens by improving soil conditions and preventing competition.
Carrots:
Carrots have deep roots that help loosen the soil. It is easier for collard greens to absorb nutrients.
Onions:
Onions have a pungent smell that helps repel pests like aphids and cabbage worms.
Beets:
They grow well alongside collard greens because they have different nutrient needs and don’t compete for space.
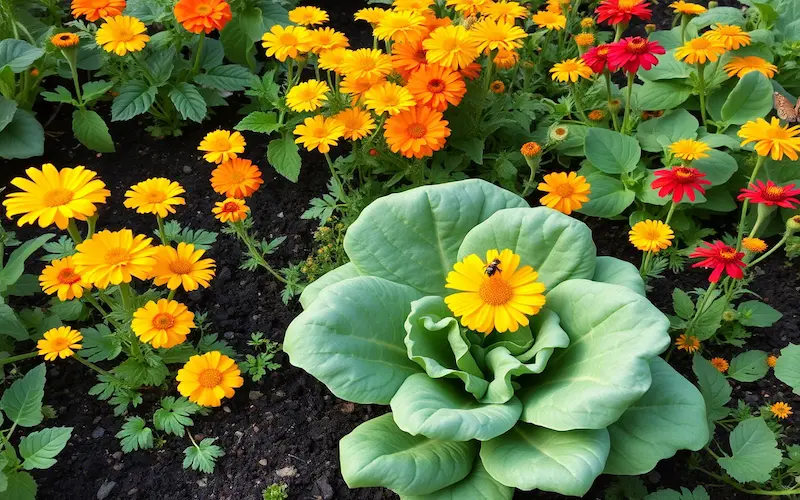
Flowers That Attract Beneficial Insects
Flowers add beauty to the garden and help protect collard greens by attracting beneficial insects that prey on pests.
Marigolds:
Marigolds are known for their strong scent. They deter nematodes and aphids while attracting pollinators.
Nasturtiums:
These flowers serve as a trap crop and lure aphids away from collard greens. They repel whiteflies and squash bugs.
Plants to Avoid Planting Near Collard Greens
Some plants benefit from collard greens, and some harm their growth by competing for nutrients or increasing the risk of diseases.
1. Strawberries
- Strawberries and collard greens are not good companions because they both require a lot of nutrients from the soil.
- The dense foliage of strawberries can also create a humid environment that encourages fungal diseases.
2. Other Cabbage Family Plants (Brassicas)
- Cabbage, broccoli, cauliflower, and Brussels sprouts belong to the same family as collard greens and attract similar pests.
- Planting them together can lead to a higher risk of disease and pest infestations, such as cabbage worms and clubroot.
Final Thoughts
Companion planting is a simple and effective way to improve the health and productivity of collard greens. By choosing the right neighbors, such as pest-repelling herbs, beneficial vegetables, and pollinator-friendly flowers, you can create a thriving garden with minimal effort.
Growing Conditions for Healthy Collard Greens
Growing collard greens successfully starts by providing the right environment. These leafy greens thrive in cool weather, nutrient-rich soil, and consistent moisture. If you meet their basic needs, they will reward you with lush, tender leaves throughout the season.
Sunlight
Collard greens need plenty of sun to grow strong and healthy.
- They require at least 6 hours of direct sunlight each day.
- More sunlight leads to bigger, more flavorful leaves.
- If you plant them in partial shade, growth will be slower, and leaves may not develop properly.
Soil
Healthy soil is the foundation of good collard greens. These plants prefer soil that is:
✔ Well-draining: Too much water can cause root rot. Ensure the soil doesn’t hold excess moisture.
✔ Rich in organic matter: Compost or aged manure improves soil fertility.
✔ Slightly acidic to neutral: A pH between 6.0 and 7.5 is ideal.
How to Prepare the Soil
- Before planting, mix Compost into the soil to boost nutrients.
- If the soil is heavy or clay-like, add sand or perlite for better drainage.
- Test the pH with a soil test kit. If the pH is too high, add sulfur; if it’s too low, add lime.
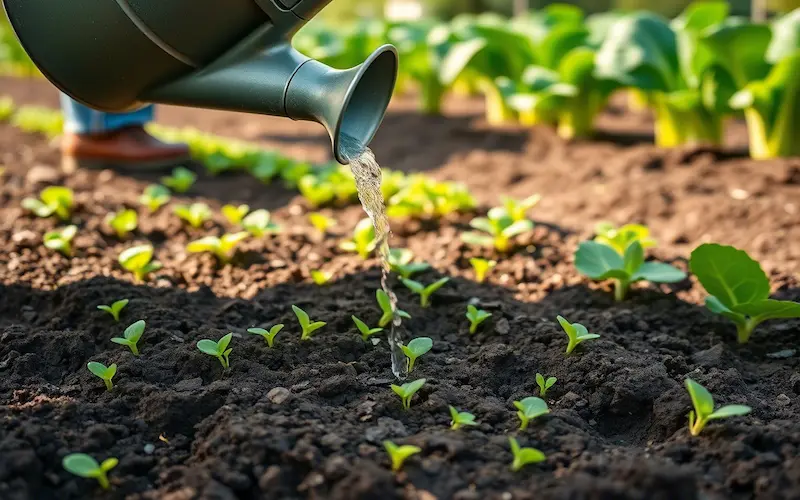
Watering:
Collard greens need consistent moisture but not overwatering because it creates problems.
- Water deeply 2–3 times a week, depending on weather conditions.
- The soil should be moist.
- Mulching around the base helps retain moisture and prevent weeds.
How to Water Properly:
- Use a soaker hose or drip irrigation to water at the base of the plant.
- Avoid overhead watering, which can promote diseases like powdery mildew.
- Water more often in hot weather and reduce watering when it cools.
Temperature:
Collard greens grow best in cool temperatures, making them a great choice for spring and fall gardens.
- The ideal growing temperature for growing collard is 60–75°F (15–24°C).
- They can tolerate light frost and taste sweeter after a cold snap.
- In hot weather, they may bolt (go to seed), causing leaves to turn bitter.
Best Planting Seasons:
✔ Spring: Plant seeds or seedlings 2–4 weeks before the last frost.
✔ Fall: Start planting in late summer for winter harvest.
Final Thoughts
The right growing conditions are the key to a successful collard greens harvest. Plants will grow strong and produce tender leaves with full sun, well-prepared soil, consistent watering, and cool temperatures.
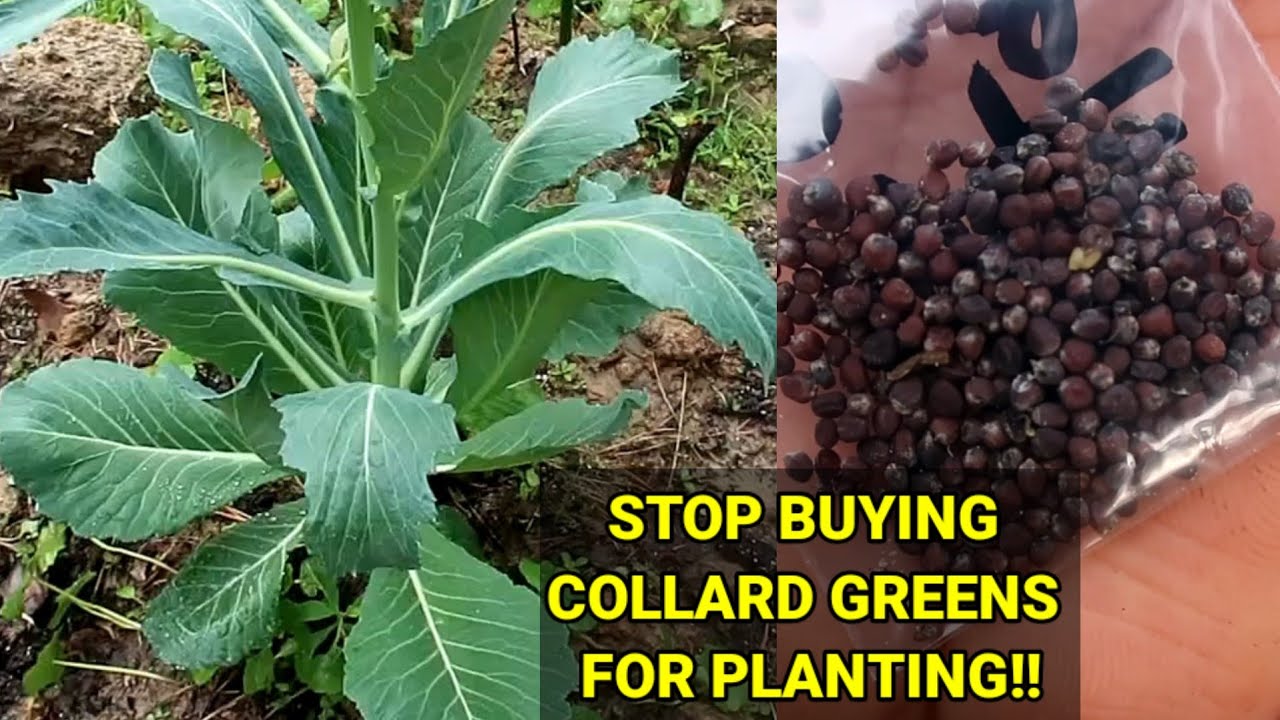
Growing Collards from Seed
Growing collard greens from seed is a simple and rewarding process. It allows you to control the growing environment and ensures strong, healthy plants. Whether you’re planting for a spring or fall harvest, following the right steps will lead to lush, flavorful greens.
When to Plant
Timing is crucial for growing collard greens successfully. These plants prefer cooler weather and grow best in spring and fall.
Spring Planting
- Start seeds indoors 4–6 weeks before the last frost if you live in a cold region.
- Transplant seedlings outdoors when temperatures are consistently above 45°F (7°C).
- If planting directly in the garden, sow seeds 2–4 weeks before the last frost once the soil is workable.
Fall Planting
- Begin planting seeds in late summer to enjoy a fall and winter harvest.
- In warm climates, collards grow through winter, especially with some frost protection.
- Cooler temperatures in fall enhance the flavour, making the leaves sweeter.
How to Plant Collard Seeds
Planting collard seeds is easy and requires minimal effort. Follow these simple steps:
1. Prepare the Soil
- Loosen the soil to about 6–8 inches deep for strong root development.
- Mix in Compost or aged manure to improve fertility.
- The soil should be well-draining and slightly acidic (pH 6.0–7.5).
2. Sow the Seeds
- Plant seeds ¼ inch deep in the soil.
- Space them 12–18 inches apart to allow room for growth.
- Keep rows 18–24 inches apart if planting in rows for good airflow.
3. Water Gently and Consistently
- Keep the soil evenly moist but not soggy.
- Water lightly but frequently until seedlings are established.
- Use a spray nozzle or watering can to avoid washing away small seeds.
4. Thin the Seedlings
- Once seedlings reach 2–3 inches tall, thin them out to one plant every 12–18 inches.
- Remove weaker plants to give stronger ones enough space and nutrients.
- You can use the thinned seedlings as microgreens in salads!
Final Thoughts
Starting collards from seed is an easy and cost-effective way to grow this nutritious green. By planting at the right time, preparing the soil well, and maintaining consistent watering, you will see healthy collard greens ready for harvest in just a few weeks.
Growing Collards in Containers
Collard greens are great for container gardening. If limited space is available for growing collard green, container gardening is the best option. With the right container, soil, and care, you can enjoy fresh, homegrown greens all season long.
Choosing a Container
The right container is essential for healthy collard growth. These leafy greens develop strong roots; they need enough space to thrive.
1. Size and Depth
- Use a 12-inch deep container to allow proper root growth.
- A 5-gallon pot is ideal for a single collard plant.
- Use a wide container to provide enough spacing if multiple plants are growing.
2. Drainage
- Ensure the container has drainage holes at the bottom to prevent root rot.
- If using a plastic or ceramic pot, drill additional holes if needed.
- Place a tray underneath to catch excess water, but do not let the roots sit in water.
Best Soil for Containers
Collard greens need rich, well-draining soil to grow well in containers. Regular garden soil is too heavy and does not provide enough nutrients.
1. Potting Mix
- Use a high-quality potting mix designed for vegetables.
- Avoid garden soil, as it can become compacted in pots.
2. Adding Compost
- Mix in Compost or aged manure to boost nutrients.
- Compost improves soil structure and helps retain moisture.
3. pH Level
- Keep the soil slightly acidic to neutral (pH 6.0–7.5) for optimal growth.
- You can test the soil with a simple pH meter or kit.
Watering & Care
Containers dry out faster than garden beds, so consistent watering is necessary for growing healthy collard greens.
1. Watering
- Water regularly, especially in hot weather, to moisten the soil.
- Avoid overwatering—collard greens like moist but not soggy soil.
- Use mulch on top of the soil to retain moisture and reduce evaporation.
2. Fertilizing
- Collards are heavy feeders, so they need extra nutrients in containers.
- Use an organic liquid fertilizer (such as fish emulsion or seaweed extract) every 2–3 weeks.
- Alternatively, mix Compost or slow-release fertilizer into the soil every month.
Final Thoughts
Growing collards in containers is easy and rewarding. You can enjoy fresh greens without needing a large garden with the right pot, soil, and care. Remember to water regularly, fertilize often, and provide good drainage for the best results.
Common Mistakes to Avoid When Growing Collard Greens
Collard greens are easy to grow, but some mistakes can cause poor growth, pest problems, or bitter leaves. If you want healthy, productive plants, avoid these common pitfalls.
1. Planting Too Close Together
Collard greens need enough space to spread their leaves and develop strong roots. Planting them too close can lead to the following:
- Stunted growth due to competition for nutrients.
- Poor airflow increases the risk of fungal diseases.
- Smaller leaves that don’t reach their full potential.
2. Overwatering or Underwatering
Collard greens need consistent moisture. Avoid over and under-watering.
- Overwatering causes root rot and attracts pests.
- Underwatering leads to wilting, slow growth, and bitter leaves.
Solution:
- Water deeply but not excessively. Keep the soil moist but not soggy.
- Use mulch to retain moisture and prevent drying out.
- Stick your finger 1 inch into the soil. If it feels dry, it’s time to water it.
3. Ignoring Pest Control
Collards are part of the brassica family, which attracts pests like:
- Cabbage worms (chew holes in leaves).
- Aphids (sap-sucking insects that weaken plants).
- Flea beetles (leave tiny holes in leaves).
Solution:
- Check leaves regularly for pests, especially the underside.
- Use floating row covers to block insects.
- Plant companion plants like dill, rosemary, or marigolds to repel pests.
- Remove caterpillars by hand or use organic sprays like neem oil.
4. Growing in Poor Soil
Collard greens are heavy feeders and need nutrient-rich soil to thrive. Poor soil can lead to:
- Slow growth and weak plants.
- Pale, yellowing leaves due to nutrient deficiencies.
- Smaller harvests with less flavour.
Solution:
- Use well-draining soil rich in organic matter.
- Mix in Compost, aged manure, or organic fertilizer before planting.
- Feed plants every few weeks with a nitrogen-rich fertilizer (like fish emulsion or compost tea).
5. Not Harvesting on Time
Leaving collard greens in the garden too long can make the leaves:
- Tough and chewy instead of tender.
- They become Bitter in flavor, especially in warm weather.
Solution:
- Harvest outer leaves first when they are about 10 inches long.
- Pick the leaves regularly to encourage more growth.
- If leaves get too tough, try cooking them longer or mixing them with other greens.
Final Thoughts
By avoiding the abovementioned mistakes, you can grow healthy, flavorful collard greens with minimal problems. Give them space, proper watering, good soil, and pest protection, and you’ll enjoy a bountiful harvest of fresh, homegrown greens.
Additional Tips for a Healthy Collard Crop
Growing collard greens is simple, and a few extra steps can help you boost plant health, prevent pests, and improve yields. Follow these tips for the best results.
1. Mulch to Retain Moisture & Prevent Weeds
Mulching is one of the easiest ways to keep your collard greens healthy and stress-free. It helps by:
- Locking in moisture reduces the need for frequent watering.
- Keeping the soil cool is especially helpful in warm weather.
- Blocking weeds so your plants don’t have to compete for nutrients.
Best mulches to use:
- Straw is Lightweight and easy to spread.
- Wood chips are long-lasting and good for moisture retention.
- Grass clippings are Free and add nitrogen to the soil.
2. Rotate Crops to Prevent Diseases
Collard greens, including cabbage, broccoli, and kale, belong to the brassica family. These plants are prone to the same diseases, such as clubroot and downy mildew.
Growing collards in the same spot every season can:
- Increase disease risks by allowing pathogens to build up in the soil.
- Deplete specific nutrients, making the soil less fertile.
How to rotate crops:
- Avoid planting collards (or other brassicas) in the same spot for at least 2–3 years.
- Grow beans or peas between seasons—they add nitrogen to the soil.
- Consider planting root crops (like carrots or beets) in the off-season.
This simple step keeps your soil healthy and disease-free.
3. Handpick Pests Early to Avoid Infestations
Pests love collard greens, but catching them early can save your crop. The most common pests include:
- Cabbage worms are caused by green caterpillars that eat holes in leaves.
- Aphids cause tiny bugs that suck plant juices and weaken growth.
- Flea beetles are Small, jumping insects that leave tiny holes in leaves.
How to prevent and control pests:
- Check leaves daily, especially underneath.
- Handpick pests and drop them in soapy water.
- Spray plants with neem oil or insecticidal soap if infestations start.
- Plant marigolds, nasturtiums, or herbs like dill nearby to repel insects naturally.
Catching pests early keeps damage under control without needing harsh chemicals.
Final Thoughts
Mulching, rotating crops, and checking for pests are best for the health of collard greens. Follow these tips, and you’ll enjoy a strong, vibrant crop all season.
FAQs About Growing Collard Greens
Here are answers to some common questions about growing collard greens.
Collard greens grow best in cool weather with the right balance of sunlight, soil, and moisture.
- Sunlight: At least 6 hours of full sun per day.
- Soil: Well-draining, rich in organic matter, with a pH between 6.0–7.5.
- Water: Keep the soil moist but not soggy. Water 1–1.5 inches per week.
- Temperature: Thrive in cool seasons (spring and fall). Can tolerate light frost.
Proper care ensures healthy, flavorful leaves throughout the season.
Collard greens prefer slightly acidic to neutral soil. The ideal soil pH range is 6.0 to 7.5.
- Add lime to raise the pH if your soil is too acidic (below 6.0).
- If your soil is too alkaline (above 7.5), add sulfur or Compost to lower it.
Testing your soil before planting helps you adjust pH for better growth.
Collard greens need nutrient-rich soil for strong, leafy growth.
- Use a balanced fertilizer like 10-10-10 (NPK) every 4–6 weeks.
- Apply organic Compost or well-rotted manure for slow-release nutrients.
- Boost growth with liquid seaweed or fish emulsion every few weeks.
A steady supply of nutrients keeps your collards healthy and productive.
Collard greens grow well in containers but need enough space to thrive.
- Use a 5-gallon container for one plant.
- Ensure the container is at least 12 inches deep with drainage holes.
- Use a high-quality potting mix with Compost for better moisture retention.
Proper container size ensures strong root development and healthy leaves
collards are cool-season crops, so timing is important.
- Spring planting: Start seeds 4–6 weeks before the last frost.
- Fall planting: Start seeds in late summer for a fall harvest.
- Winter growing: In mild climates, plant collards for a winter harvest.
Plant when temperatures are between 45–75°F (7–24°C) for best results.
Conclusion
Growing collard greens is easy and rewarding. Collard greens are nutritious, easy to grow, and perfect for home gardens. Whether you’re a beginner or an experienced gardener, growing collards can be a fun and productive experience.
Why not start a small batch of collard greens in your garden or a container? You’ll enjoy a steady harvest of fresh, tasty leaves with the right care for months.
Have you grown collard greens before? Share your experience in the comments below! If you have any questions, feel free to ask.


I read your article in the planning phase of my gardening project. I found it informative and helpful now I’m ready to start planting my well thought out garden.