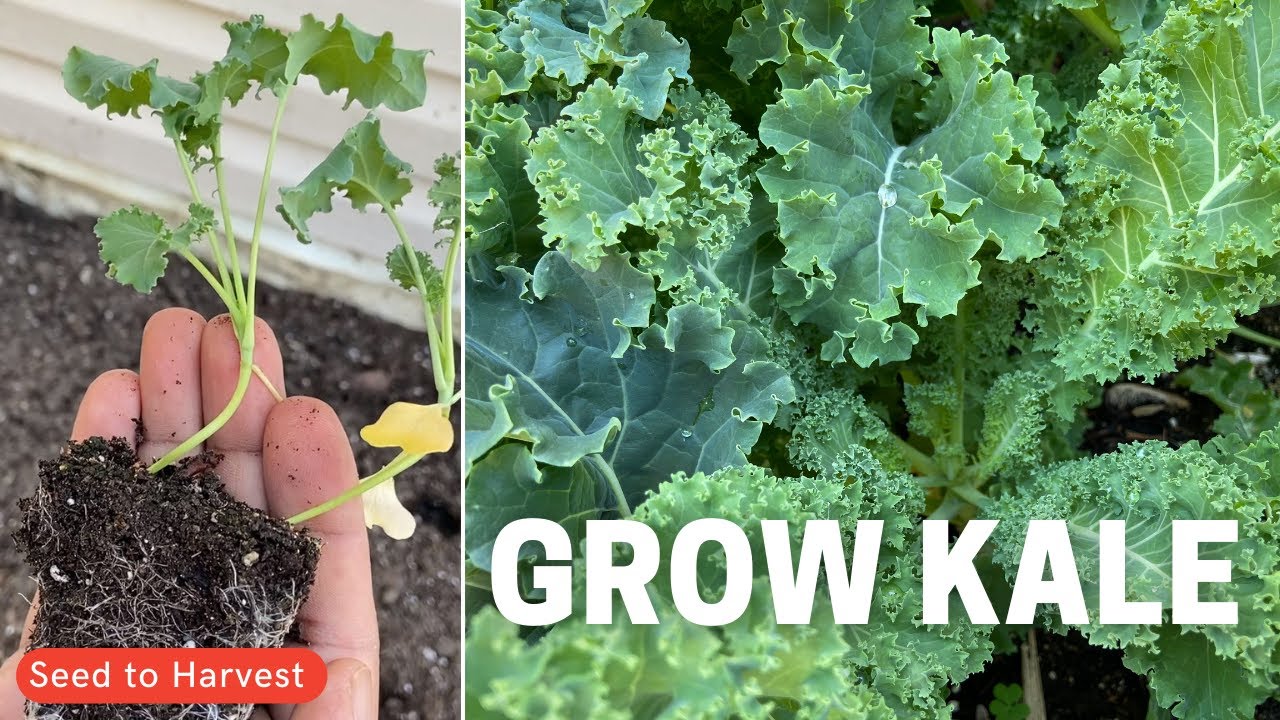
How to Grow Kale: The Complete Guide From Planting to Harvest
Published: 27 Mar 2025
Introduction:
Kale is among the most popular leafy greens, loved by home gardeners and health enthusiasts. It belongs to the Brassica oleracea family, which includes vegetables like cabbage, broccoli, and Brussels sprouts. Kale is known for its hardy nature and nutrient-dense leaves. It thrives in various climates and can be grown quickly, even by beginners.
Why is Kale Popular in Home Gardens?
Many home gardeners choose to grow kale plants because they are:
✔ Easy to grow: It requires minimal care and grows well in different seasons.
✔ Fast-growing: You can start harvesting within 50–75 days.
✔ Cold-tolerant: Kale can survive frost and even taste better after exposure to cold weather.
✔ Productive: A single kale plant can provide multiple harvests over several months.
Nutritional Benefits of Kale
Kale is often called a superfood because of its rich nutrient content. It is packed with:
Vitamins: Kale is high in vitamins A, C, and K, which support immunity, skin health, and bone strength.
Minerals: They contain iron, calcium, and potassium that help with blood circulation and bone health.
Antioxidants: These help fight inflammation and protect against chronic diseases.
Fiber: They support digestion and gut health.
Low Calories, High Nutrients: They are ideal for weight management and provide essential nutrients.
Because of these benefits, kale is a great vegetable to grow at home—ensuring a fresh, organic meal supply.
What This Guide Covers
In this guide, you will learn how to grow kale step by step, from planting kale seeds or seedlings to harvesting fresh, leafy greens. We will cover:
✅ The best conditions for kale cultivation.
✅ How to properly plant kale in your garden or containers.
✅ Essential care tips for a healthy kale plant.
✅ How to harvest and store kale for long-lasting freshness. By the end of this guide, you will have all the knowledge needed to grow fresh, nutrient-rich kale in your garden. Let’s get started!
Understanding the Kale Plant
What is Kale (Brassica oleracea)?

Kale (Brassica oleracea) is a leafy green vegetable in the same family as cabbage, cauliflower, and broccoli. It is one of the most nutritious and resilient vegetables and a favorite among home gardeners. Kale thrives in cooler temperatures and can withstand frost, making it an ideal crop for year-round cultivation in many regions.
Kale has been cultivated for centuries and is known for its deep green, nutrient-packed leaves. Due to its mild yet slightly earthy flavor, it is widely used in salads, smoothies, soups, and stir-fries. Some varieties even develop a sweeter taste after exposure to frost.
Different Types of Kale
There are several varieties of kale, each with unique characteristics in terms of texture, taste, and growth patterns. The two most common types are:
Curly Kale (Scots Kale)
✔ The most recognizable type, with tight, ruffled leaves and a deep green or bluish color.
✔ Has a slightly bitter taste, which becomes milder after frost.
✔ It grows compactly. It is excellent for small gardens and containers.
✔ It is popular in salads, soups, and kale chips.
Flat-Leaf Kale (Lacinato Kale or Dinosaur Kale)
✔ Features long, narrow, dark green leaves with a wrinkled texture.
✔ It is milder and slightly sweeter compared to curly kale.
✔ It is also called Tuscan kale or Black kale. It is commonly used in Italian dishes.
✔ It is ideal for sautéing, blending into smoothies, or adding to pasta dishes.
Other less common kale varieties include:
✔ Red Russian Kale: It Has reddish-purple stems and soft, flat leaves with a slightly sweet flavor.
✔ Siberian Kale: It is highly cold-hardy with large, tender leaves.
✔ Ornamental Kale: It is grown for decorative purposes but still edible, with vibrant purple, pink, or white leaves.
Why Kale is a Cold-Hardy and Easy-to-Grow Plant
One of the biggest reasons kale is so popular among gardeners is its ability to thrive in various climates. Unlike many vegetables that struggle in cold weather, kale grows better in cooler temperatures.
✔ Cold-Tolerant: Kale can withstand frost and even snow. Exposure to frost makes the leaves sweeter and more tender.
✔ Fast-growing: Kale takes only 50–75 days from seed to harvest, allowing for multiple harvests in a single season.
✔ Pest-resistant: While it can attract some pests, kale is generally more resilient than other leafy greens.
✔ Grows in Various Conditions: It can be planted in garden beds, raised beds, or containers, making it versatile and space-efficient.
✔ Minimal Maintenance: With the right soil, sunlight, and watering, kale requires little extra care compared to other vegetables.
The Growth Cycle of Kale
Just like other members of the Brassica family, such as broccoli growing stages, kale follows a simple growth cycle:
1️⃣ Seed Germination: Kale seeds sprout in 5–10 days in moist, well-drained soil.
2️⃣ Seedling Stage: Young kale seedlings develop strong roots and true leaves.
3️⃣ Vegetative Growth: The plant produces multiple large, leafy greens as it matures.
4️⃣ Maturity & Harvest: Kale leaves can be harvested continuously, ensuring a long growing season. Because it is a hardy and easy-to-grow plant, it’s perfect for beginners and experienced gardeners. Whether you want to grow kale in garden beds, containers, or raised planters, it is a nutrient-rich, high-yield crop that will keep producing throughout the season.

Best Conditions for Kale Cultivation
Kale is a hardy and versatile leafy green that thrives in various climates. However, the right growing conditions are essential for the best growth, flavor, and yield. Let’s explore the critical factors that contribute to successful kale cultivation.
Soil Requirements for Kale
The soil quality plays a crucial role in how well kale plants grow. Kale prefers loamy, well-drained soil that is rich in organic matter.
Key Soil Factors for Healthy Kale Growth
✔ Well-Drained Soil: Kale does not tolerate waterlogged soil. Ensure proper drainage to prevent root rot. Raised garden beds can help improve drainage.
✔ Loamy Texture: A light, fluffy soil that retains moisture while allowing excess water to drain is ideal.
✔ Organic Matter: Adding compost, aged manure, or organic mulch enriches the soil with nutrients and improves moisture retention.
✔ pH Level: The ideal soil pH for kale is between 6.0 and 7.5. This slightly acidic to neutral range helps maximize nutrient absorption.
How to Improve Soil for Kale?
➡ Mix compost or well-rotted manure into the soil before planting to provide essential nutrients.
➡ If the soil is too acidic, add garden lime to raise the pH.
➡ If soil is too alkaline, mix in sulfur or organic matter like pine needles to lower the pH.
➡ Avoid heavy clay soil, as it can cause poor drainage. If you have clay soil, amend it with sand and compost to improve aeration.
Pro Tip: Conduct a soil test to check pH and nutrient levels before planting. This ensures you adjust the soil correctly for optimal kale growth.
Sunlight Requirements for Kale
Kale is a cool-season vegetable that requires adequate sunlight for healthy growth and leaf production.
How Much Sun Does Kale Need?
✔ Full Sun (6-8 hours daily): Kale grows best in full sunlight, producing lush, dark green leaves with high nutritional content.
✔ Partial Shade (4-6 hours daily): Some afternoon shade can prevent wilting and bitterness in hot climates.
Best Planting Spots for Maximum Sunlight
✔ Garden Beds: Choose a south-facing location with good sun exposure.
✔ Raised Beds & Containers: Place them in an area that gets plenty of sunlight but offers shade during extreme heat.
✔ Balconies & Rooftops: If growing kale in pots, position them where they get at least 4-6 hours of sunlight.
Pro Tip: If growing kale in the summer, use a shade cloth to protect it from excessive heat and sunburn.
Temperature Requirements for Kale
Kale is known for its cold tolerance and ability to thrive in cool weather. It grows best in temperatures between 55°F and 75°F (13°C – 24°C).
Best Seasons to Grow Kale
✔ Spring (March to May): Start seeds indoors or sow directly in early spring when temperatures are cool.
✔ Fall (September to November): The best time for planting, as kale thrives in the cool autumn air.
✔ Winter (Mild Climates): Kale can be grown throughout winter properly in frost-free regions.
What Happens to Kale in Different Temperatures?
➡ Below 50°F (10°C): Kale becomes sweeter and more tender after exposure to light frost.
➡ Above 80°F (27°C): High temperatures can cause kale to become bitter and harsh.
➡ Frost & Snow: Kale is highly frost-resistant and can survive temperatures as low as 20°F (-6°C).
Pro Tip: If expecting heavy frost, cover plants with row covers or mulch for extra protection. The cold enhances kale’s sweetness rather than harming it!
Final Thoughts: By ensuring the right soil, sunlight, and temperature, you can grow healthy, flavorful kale in your garden. Whether you plant in raised beds, containers, or garden rows, these conditions will help maximize your yield and improve plant health.
How to Plant Kale Successfully
Planting kale is easy and rewarding, whether you start from seeds or seedlings. With the proper techniques, you can enjoy a healthy and productive kale plantation throughout the growing season. Let’s dive into the best methods for planting kale and setting it up for strong growth.
Choosing Kale Seeds or Seedlings
You have two options when growing kale: starting from seeds or transplanting seedlings. Each method has its benefits, depending on your gardening goals and timeline.

Growing Kale from Seeds
✔ More Variety: Seeds offer a wider range of kale types, including curly kale, lacinato kale, and red Russian kale.
✔ Cost-Effective: Seeds are cheaper than buying seedlings.
✔ Direct Control: You can manage plant health from the start, ensuring vigorous, disease-free plants.
Growing Kale from Seedlings
✔ Faster Growth: Seedlings give you a head start, making them ideal for shorter growing seasons.
✔ Easier for Beginners: No need to worry about germination or transplant shock.
✔ Reliable Yield: Buying healthy, disease-free seedlings increases the chances of successful kale cultivation.
Where to Buy Healthy Kale Seedlings?
For the best results, buy quality kale seedlings from:
➡ Local Nurseries: Check for sturdy, dark green leaves without any yellowing or spots.
➡ Garden Centers: Look for organic and disease-resistant varieties.
➡ Online Seed Suppliers: Trusted websites offer certified non-GMO and heirloom varieties for better yield.
How Do I Plant Kale? (Step-by-Step Guide)
Now that you’ve chosen between seeds or seedlings, it’s time to start planting! Follow this simple guide to ensure strong and healthy kale growth.
Step 1: When to Start Planting Kale?
✔ Spring Planting: Start seeds indoors 4-6 weeks before the last frost. Transplant seedlings outdoors when the soil reaches 50°F (10°C).
✔ Fall Planting: Directly sow seeds 8-10 weeks before the first expected frost. The cool weather will enhance kale’s sweetness.
✔ Winter Planting: In mild climates, plant kale in early winter for an extended harvest.
Tip: Like cauliflower cultivation, early planting ensures a longer growing season and better pest resistance.
Step 2: How Deep to Plant Kale Seeds?
➡ Seeds: Plant ¼ to ½ inch (6-12 mm) deep in moist, loose soil.
➡ Seedlings: Transplant at the same depth they grew in their nursery pot.
Step 3: Proper Spacing for Kale Plants
✔ Rows: Space rows 18-24 inches (45-60 cm) apart.
✔ Plants: Keep 12 inches (30 cm) between each plant to allow proper airflow.
✔ Containers: Choose a 12-inch deep container with drainage holes if growing kale in pots.
Tip: Good spacing prevents overcrowding, which helps reduce disease risk and promotes more considerable leaf growth.
Step 4: Watering Tips for Kale Plantation
Kale loves consistently moist soil, but overwatering can lead to root rot. Follow these best practices:
💧 Watering Frequency: Water 1-2 inches (2.5-5 cm) per week, depending on the weather.
💧 Morning Watering: Water in the morning to prevent fungal diseases.
💧 Mulching: To retain moisture, add a 2-inch (5 cm) layer of organic mulch (straw, leaves, or grass clippings).
💧 Avoid Wet Leaves: Use drip irrigation or a soaker hose to water at the base and prevent fungal infections.
Final Thoughts: Planting kale is simple and rewarding when done correctly. Whether you grow from seeds or seedlings, proper timing, spacing, and watering techniques will help you achieve a strong, healthy harvest.
Caring for Kale Plants
Once your kale plants are in the ground, proper care is essential for healthy growth and maximum yield. Regular watering, fertilizing, and pest management will ensure your kale remains productive throughout the season. Below, we’ll discuss the best practices for caring for your kale plants.
Watering & Fertilizing
How Often to Water Kale?
Kale thrives in consistently moist soil, but overwatering can cause root rot. Follow these best watering practices:
💧 Watering Frequency: Provide 1-2 inches (2.5-5 cm) of water per week, adjusting based on rainfall.
💧 Morning Watering: Water in the morning to allow leaves to dry, preventing fungal diseases.
💧 Deep Watering: Water at the base of the plant rather than on the leaves to avoid mildew and rot.
💧 Mulching: Apply a 2-inch (5 cm) mulch around the base to retain moisture and regulate soil temperature.
Pro Tip: Like in broccoli growing stages, steady moisture ensures tender, flavorful leaves without bitterness.
The Best Organic Fertilizers for Kale Growth
Kale is a nutrient-hungry plant, especially rich in leafy growth, so proper feeding is essential. Use the following organic fertilizers:
✔ Compost: Add aged compost or worm castings for a slow-release supply of nutrients.
✔ Fish Emulsion: A liquid fish-based fertilizer applied every 2-3 weeks boosts nitrogen.
✔ Bone Meal: Provides phosphorus for root development and vigorous plant growth.
✔ Seaweed Extract: Supplies micronutrients that improve kale’s resistance to stress.
Fertilizing Schedule:
➡ At Planting: Mix compost or slow-release organic fertilizer into the soil.
➡ Mid-Growth: Feed kale every 4-6 weeks with a balanced organic fertilizer.
➡ Heavy Harvesting: If harvesting regularly, apply a light liquid fertilizer every 2-3 weeks.
Pest and Disease Management
Kale is a hardy plant, but ordinary garden pests and diseases can attack it. Below are the most frequent threats and how to manage them naturally.
Common Pests That Attack Kale
🐛 Cabbage Worms: Green caterpillars that chew through kale leaves.
🦟 Aphids: Tiny sap-sucking insects that cluster on the undersides of leaves.
🐞 Flea Beetles: Small black beetles that create tiny holes in leaves.
🦋 Whiteflies: Tiny white-winged pests that weaken plants by sucking sap.
Natural Remedies to Protect Kale from Pests
🌱 Handpicking: Remove visible caterpillars and worms by hand.
🌼 Neem Oil Spray: Mix 2 teaspoons of neem oil with a liter of water and spray every 7-10 days.
🦋 Floating Row Covers: Protect young plants by covering them with fine mesh fabric.
🦠 Bacillus thuringiensis (BT): A natural bacteria that kills caterpillars but is safe for humans.
🌿 Companion Planting: Grow marigolds, dill, or mint nearby to repel aphids and cabbage worms.
Common Kale Diseases and Prevention
🦠 Powdery Mildew: White powdery spots on leaves due to high humidity.
🌿 Black Rot: Yellowing leaves with black spots caused by bacteria.
🍃 Downy Mildew: Yellow patches on leaves due to excessive moisture.
✅ Prevention Tips:
✔ Proper Spacing: Keep plants 12-18 inches apart for airflow.
✔ Water at the Base: Avoid watering the leaves to reduce fungal growth.
✔ Rotate Crops: Avoid planting kale in the same spot every year.
Supporting Kale Growth in Different Seasons
Kale is a cool-season crop, but with the proper care, it can be grown successfully in both hot summers and cold winters.
How to Grow Kale in Hot Summers
In hot climates, kale can struggle with heat stress and bolting (premature flowering). To keep it healthy:
🌞 Provide Partial Shade: Use shade cloth or plant kale near taller crops for protection.
💧 Increase Watering: Water deeply in the early morning or evening.
🌿 Mulch Heavily: A thick mulch layer keeps roots cool and prevents evaporation.
❌ Avoid Summer Fertilization: Overfeeding encourages leggy, weak growth in heat.
Tip: Like in broccoli growing stages, heat stress causes bitterness in leaves, so shading and proper watering are crucial.
How to Protect Kale Plants from Frost in Winter
Kale thrives in cold temperatures, but extreme frost can damage young plants. To protect your crop:
❄ Use Row Covers: Cover plants with garden fleece or plastic tunnels on freezing nights.
🌱 Mulch the Base: A 2-3 inch (5-7 cm) mulch layer insulates roots from frost.
🏡 Grow in Containers: In very cold climates, transfer pots to a sheltered area or greenhouse.
💨 Wind Protection: Use burlap screens to shield plants from icy winds.
Fun Fact: Kale becomes sweeter after frost, as the cold converts starch into sugars!
Final Thoughts: Caring for kale is simple when you follow the right steps. Proper watering, fertilizing, pest control, and seasonal protection will keep your kale plants healthy and productive. Whether growing in hot summers or frosty winters, these techniques will help you achieve the best harvest.
Harvesting and Storing Kale
Kale is a fast-growing leafy vegetable that provides multiple harvests throughout its growing season. Knowing when and how to harvest kale properly ensures a continuous supply of fresh, flavorful leaves. Additionally, proper storage techniques help keep kale fresh and nutritious for extended periods.

When is Kale Ready to Harvest?
Kale can be harvested at different stages depending on your preference:
Baby Kale (Young Leaves)
Ready to harvest in 25-30 days after planting.
Leaves are small, tender, and slightly sweeter than mature kale.
Ideal for salads and smoothies.
Mature Kale (Full-Grown Leaves)
They are ready in 50-60 days after planting.
Their leaves are more prominent, thicker, and more flavorful.
They are best for cooking stir-fries and soups.
Signs That Kale is Ready to Pick:
✔ Leaves reach 5-6 inches (12-15 cm) in length.
✔ The plant has a strong central stem with multiple leaves.
✔ Leaves are firm, dark green, and crisp.
✔ New growth appears in the center of the plant.
Tip: Kale is a cut-and-come-again crop, meaning you can harvest leaves multiple times without removing the whole plant!
How to Harvest Kale Leaves Without Damaging the Plant
Proper harvesting keeps the kale plant growing for months. Follow these best practices:
🌿 Pick the Outer Leaves First: Start by harvesting the more significant, older leaves from the bottom of the plant.
🌱 Leave the Central Growing Tip: Avoid cutting the top inner leaves to allow continuous growth.
✂ Use Sharp Scissors or Pruners: Gently cut leaves close to the stem, leaving at least 3-5 leaves on the plant.
🔁 Harvest Regularly: Picking leaves every 5-7 days encourages growth.
🌦 Harvest in the Morning: Cooler temperatures help retain maximum flavor and nutrients.
Best Ways to Store Fresh Kale for Long-Lasting Use
Kale wilts quickly if not stored properly. Here’s how to keep it fresh for days or even months:
Short-Term Storage (Up to 1 Week)
✔ Refrigeration: Place unwashed kale in a plastic bag with tiny air holes and store it in the vegetable crisper drawer.
✔ Use a Damp Paper Towel: Wrap kale in a slightly damp paper towel before storing it in a sealed bag.
✔ Avoid Washing Before Storage: Moisture causes faster spoilage, so wash only before use.
Shelf Life: Fresh kale lasts 5-7 days in the refrigerator.
Long-Term Storage (Weeks to Months)
If you want to preserve kale for future use, try these methods:
Freezing (Best for Smoothies & Cooking)
✔ Wash and remove tough stems.
✔ Blanch in boiling water for 2 minutes, then transfer to ice water.
✔ Drain, dry, and store in airtight freezer bags.
✔ Use within 6-8 months for the best flavor.
Tip: Frozen kale works excellent in soups, stir-fries, and stews.
Drying (For Kale Chips & Seasoning)
✔ Wash and dry the leaves thoroughly.
✔ Spread on a baking sheet and dry at low heat (120°F/50°C) for 4-6 hours.
✔ Store in an airtight jar for up to 6 months.
Tip: Crushed dried kale can be used as a nutritious topping for meals.
Pickling or Fermenting (For Probiotic Benefits)
✔ Mix chopped kale with salt, garlic, and spices.
✔ Pack tightly into a sterilized jar and cover with brine.
✔ Let it ferment at room temperature for 1-2 weeks.
Tip: Fermented kale is rich in probiotics, boosting gut health.
Final Thoughts
Harvesting and storing kale correctly ensures a fresh supply of nutritious leaves for months. Regular harvesting encourages continuous growth, and proper storage methods keep your kale fresh and flavorful.
Common Mistakes to Avoid in Kale Growing
Growing kale is easy and rewarding, but inevitable mistakes can stunt growth, attract pests, or reduce yield. By avoiding these common errors, you can ensure a healthy kale harvest with minimal effort.
Overwatering or Poor Soil Drainage
💧 Mistake: Watering kale too frequently or planting it in poorly drained soil.
❌ Why It’s a Problem:
Too much moisture leads to root rot and fungal diseases.
Waterlogged soil prevents roots from absorbing oxygen and nutrients.
Overwatered kale may have yellowing leaves and weak stems.
✅ How to Fix It:
✔ Water only when the top 1-2 inches of soil is dry.
✔ Use well-draining, loamy soil mixed with organic compost.
✔ Plant kale in raised beds or containers if your soil retains too much moisture.
✔ Ensure proper spacing between plants for good airflow.
Planting Too Close Together (Crowding Reduces Airflow)
🌱 Mistake: Placing kale plants too close together during planting.
❌ Why It’s a Problem:
Crowded plants compete for nutrients, leading to weaker growth.
Poor airflow increases the risk of fungal infections.
Overlapping leaves make it harder to spot pests and diseases early.
✅ How to Fix It:
✔ Space kale plants 12-18 inches apart for good airflow.
✔ If growing in rows, leave at least 18-24 inches between rows.
✔ Thin out overcrowded seedlings to allow proper growth.
✔ Use vertical gardening techniques if space is limited.
Tip: Proper spacing helps kale grow more prominent, healthier leaves and makes harvesting easier.
Ignoring Pests and Diseases Early On
🐛 Mistake: Not checking kale plants regularly for pests or diseases.
❌ Why It’s a Problem:
Aphids, cabbage worms, and flea beetles can quickly destroy leaves.
Diseases like powdery mildew and black rot spread fast if left untreated.
Delayed action means more significant infestations that are harder to control.
✅ How to Fix It:
✔ Inspect kale leaves daily for holes, discoloration, or pests.
✔ Remove pests manually or with organic insecticidal soap.
✔ Use floating row covers to protect young plants.
✔ Apply companion planting (e.g., growing kale with marigolds or basil to deter pests).
✔ Rotate crops yearly to prevent disease buildup in the soil.
Final Thoughts
By avoiding these mistakes, you can grow stronger, healthier kale plants with higher yields. Remember to:
✅ Keep the soil moist but not soggy.
✅ Space plants properly to improve airflow.
✅ Monitor for pests and diseases early. With these best practices, your kale garden will thrive, giving you fresh, nutritious leaves for months
Faqs about Growing Kale
Kale is a popular leafy green that many gardeners love to grow. However, if you’re new to kale cultivation, you might question its growth, care, and harvesting. Below are answers to the most commonly asked questions.
✅ Yes, kale is one of the easiest vegetables to grow!
Kale thrives in various climates, requires minimal care, and grows well in gardens, containers, or raised beds. It is also cold-hardy and can withstand light frosts, perfect for fall and spring gardening.
Tips for Easy Kale Growing:
Use loamy, well-drained soil with organic compost.
Water regularly, but avoid overwatering.
Space plants 12-18 inches apart for good airflow.
Protect young seedlings from pests like aphids and cabbage worms.
Fun Fact: Kale is more flavorful after a light frost, as the cold enhances sweetness.
🌱 Kale takes around 50-75 days to mature from seeds.
Baby kale leaves can be harvested in 25-30 days.
Full-grown kale is ready in about 2 to 2.5 months.
If you start with kale seedlings, they mature faster (around 40-50 days). Tip: Plant successive batches every 2-3 weeks for continuous harvests.
✅ Yes! Kale is a cut-and-come-again vegetable.
When harvesting, pick the outer leaves first, leaving the center intact.
The plant will continue to produce new leaves for several months.
If properly maintained, kale can grow for an entire season or even longer in mild climates. Tip: Regular harvesting encourages new growth and prevents kale from becoming too harsh.
☀️ Kale prefers full sun but can tolerate partial shade.
Full Sun (6+ hours of sunlight) → Faster growth & larger leaves.
Partial Shade (3-4 hours of sunlight) → Slower growth but still productive.
Best Practice: Provide some afternoon shade to prevent wilting if kale grows in hot summers.
Final Words
So, guys, in this article, we have covered how to grow kale. I recommend trying kale in your home garden because it’s easy to grow and nutritious. Whether you are a beginner or an experienced gardener, a fresh batch of homegrown kale is always rewarding. Start planting today, and let me know how it goes in the comments below!


- Be Respectful
- Stay Relevant
- Stay Positive
- True Feedback
- Encourage Discussion
- Avoid Spamming
- No Fake News
- Don't Copy-Paste
- No Personal Attacks
- Be Respectful
- Stay Relevant
- Stay Positive
- True Feedback
- Encourage Discussion
- Avoid Spamming
- No Fake News
- Don't Copy-Paste
- No Personal Attacks
