How To Grow Lady Finger (Bhindi) At Home: Benefits & Expert Care Tips
Published: 9 Dec 2023
Welcome to the world of home gardening, where cultivating your bounty is not just a rewarding endeavor but also an incredibly satisfying experience. In this article we will explore how to grow Lady Finger known as Bhindi or Okra, in your own home. Packed with benefits and versatile in its applications, Lady Finger is a must-have addition to your home garden. From its intriguing facts to therapeutic properties and practical tips on cultivation, this article is your concise roadmap to successfully nurture and harvest this nutritious delight. Let’s embark on this green journey together and unlock the secrets to cultivating vibrant and growing Lady Finger plants at home.
Start exploring
1. How to Grow Lady Finger at Home
Lady Finger, also known as Bhindi or Okra, is a warm-season vegetable that thrives in well-prepared soil and ample sunlight. Here’s a how-to guide to get you started with your exploration:
2. Soil Preparation
Before planting Lady Finger, ensure the soil is well-draining, loose, and rich in organic matter. Follow these steps:

Loosen the Soil
- Use a garden fork to loosen the soil to a depth of at least 12 inches. This helps the roots penetrate easily and allows for better water and nutrient absorption.
- Add Organic Matter
- Incorporate well-rotted compost or aged manure into the soil. This enhances fertility and provides essential nutrients for plant growth.
- Water:
- Proper watering is crucial for Lady Finger plants. Follow these guidelines:
- Consistent Moisture:
- Lady Finger plants prefer consistent moisture. Water regularly, especially during dry spells, to prevent the soil from drying out completely.
- Avoid Water logging:
- Ensure proper drainage to prevent water logging, as Lady Finger plants are susceptible to root rot in excessively wet conditions.
Temperature
Temperatures between 24°C and 32°C are ideal for warm-season crops like lady fingers (75°F to 90°F).
Planting Time:
Plant Lady Finger seeds or seedlings as soon as the soil reaches a minimum temperature of 60°F (15°C).
Protection from Cold: If you’re in a cooler climate, consider using row covers or planting in containers that can be moved indoors during colder nights.
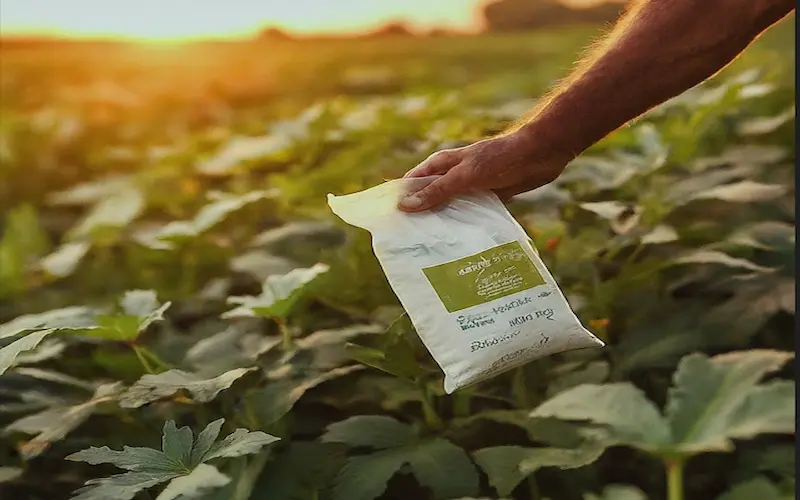
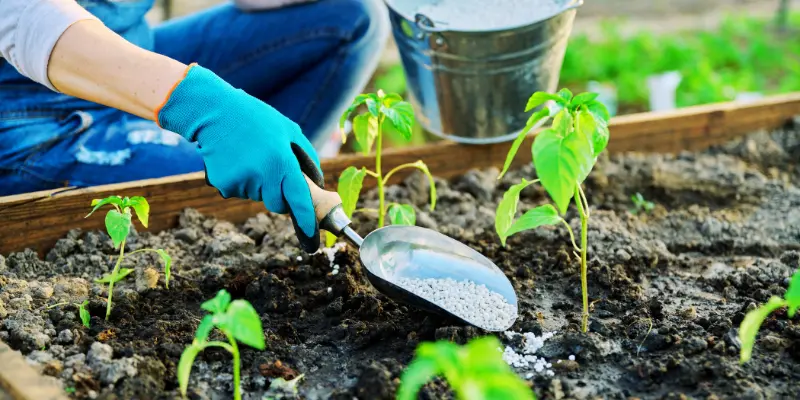
Fertilizer
Proper fertilization ensures healthy growth and a bountiful harvest:
- Balanced Fertilizer: To enhance overall plant development, use a balanced fertilizer that contains equal quantities of potassium, phosphorus, and nitrogen.
- Side Dressing: Apply fertilizer when the plants are about 4-6 inches tall, and again when okra plant flowering or okra blossom.
Sunlight
Lady Finger plants thrive in full sunlight. Ensure:
- Sun Exposure:
For best growth and fruit production Place the Lady Finger plant in an area that gets six to eight hours of direct sunlight per day.
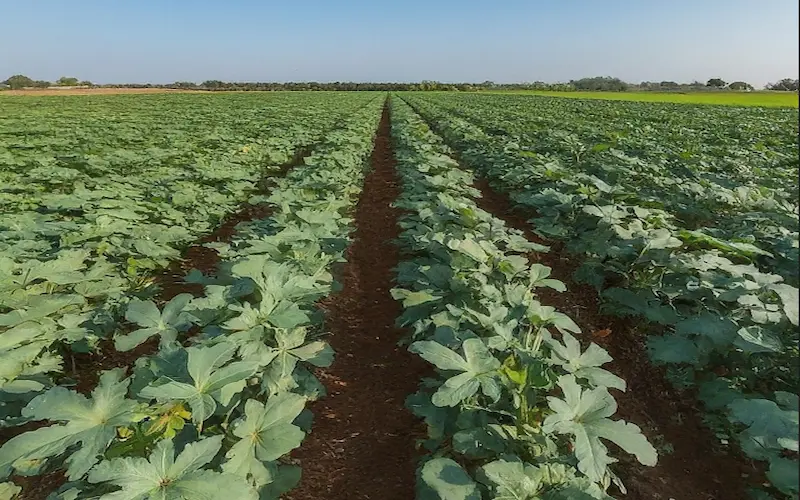
Location
Choose the right spot for your Lady Finger plants:
- Spacing: Plant Lady Finger seeds or seedlings about 12 to 18 inches apart to allow sufficient space for growth and air circulation.
- Companion Planting: Consider planting Lady Finger near compatible companions like tomatoes or peppers to enhance mutual growth.
Growing Tips
To maximize your Lady Finger harvest, keep these tips in mind:
- Regular Inspections: Regularly inspect plants for pests or diseases, and respond quickly if something seems off.
- Staking: Provide support or staking for the plants once they reach a height of 2-3 feet to prevent bending or breaking of stems.
By following these steps and tips, you’re well on your way to cultivating thriving Lady Finger plants at home. The next sections will delve into the specific stages of planting, caring, and harvesting to ensure a successful homegrown bounty.
3. Planting and Transplantation
Soil Preparation
Loosening the Soil: Make sure the soil is ready before beginning the planting process. Use a garden fork to break up the earth to a minimum depth of 12 inches. This practice promotes better root penetration and allows for optimal water and nutrient absorption.
Adding Organic Matter: Incorporate well-rotted compost or aged manure into the soil. This step enhances soil fertility, providing essential nutrients that support the healthy growth of Lady Finger plants.
Planting Lady Finger Seeds
Sowing Depth: Plant Lady Finger seeds about 1 inch deep in the prepared soil. Ensure proper spacing, with about 3 inches between each seed.
Watering: After planting, water the area thoroughly. Keep the soil consistently moist until the seeds germinate, typically within 7 to 14 days.
Thin Out Seedlings: Once the seedlings are a few inches tall, thin them out, leaving the healthiest plants at the recommended spacing (12 to 18 inches apart).
Transplanting Lady Finger Seedlings
Selecting Healthy Seedlings: If you choose to start with seedlings, select healthy ones from reputable sources or consider growing them indoors before transplanting.
Transplanting Timing:
Wait until the soil has warmed up, and there is no risk of frost before transplanting seedlings into the garden. This is typically after the last expected frost date in your region.
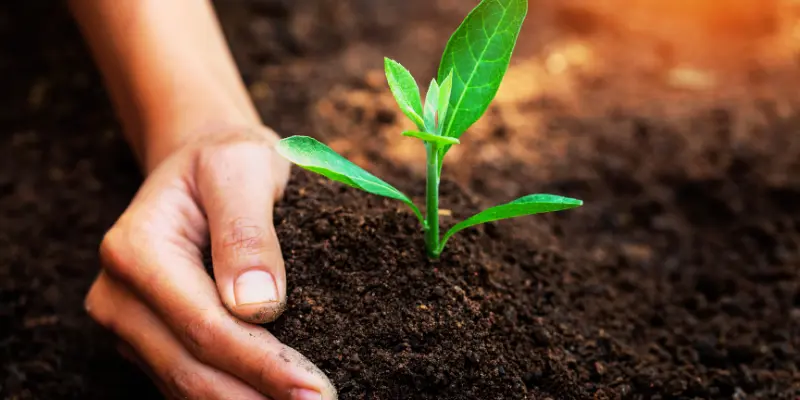
Digging Holes:
make holes in the prepared soil that are slightly larger than the seedlings’ root balls.
Transplanting Process:
Carefully remove the seedlings from their containers and place them in the prepared holes. Gently backfill with soil and water thoroughly.
Caring for Young Lady Finger Plants
Mulching:
To control soil temperature, prevent weed growth, and preserve soil moisture, mulch the area surrounding the plants with natural material.
Watering Schedule:
Water the plants regularly going forward, making sure the soil stays uniformly moist. Avoid overwatering to prevent waterlogged conditions.
Fertilizing:
Apply a balanced fertilizer when the Lady Finger plants are about 4-6 inches tall. Repeat the application when okra plants flowering.
By following these planting and transplantation guidelines, you set the foundation for healthy Lady Finger plants. The next section will focus on caring for your growing plants to ensure a bountiful harvest.
4. Caring for Lady Finger
The Beginner’s Guide
Caring for Lady Finger plants involves a combination of attention to soil, water, temperature, and protection against pests. Here’s a beginner’s guide to ensure your Lady Finger plants thrive:
Care Tips for Lady Finger
Watering:
- Consistency is Key: Lady Finger plants prefer consistent moisture. Water the plants regularly, especially during dry periods, to keep the soil evenly moist.
- Avoid Waterlogging: Maintain adequate drainage to avoid waterlogging, because excess water can cause root rot.
- Temperature
Optimal Range: The ideal temperature range for lady finger plants is between 24°C and 32°C (75°F and 90°F).
Protection from Cold: If you’re in a cooler climate, consider using row covers or plant in containers that can be moved indoors during colder nights.
Fertilization
Balanced Fertilizer: To enhance overall plant development, use a fertilizer with a balanced formula that contains equal amounts of potassium, phosphorus, and nitrogen.
Timing: Apply fertilizer when the plants are about 4-6 inches tall and again when okra blossom.
Sunlight
Full Sun Exposure: In full sun, lady finger plants grow well. To ensure the best growth and fruit production, make sure they receive a minimum of 6–8 hours each day in direct sunlight.
Location:
Spacing: To promote healthy development and air circulation, space Lady Finger seeds or seedlings 12 to 18 inches apart.
- Companion Planting: Consider planting Lady Finger near compatible companions like tomatoes or peppers to enhance mutual growth.
The Amazing Powers of A Humble Bacterium
Nitrogen Fixation
Certain bacteria, like Rhizobium, can form a symbiotic relationship with Lady Finger plants.
- These bacteria help convert atmospheric nitrogen into a form that the plants can use, promoting healthier growth.
Beneficial Effects:
- Improved nutrient absorption and utilization by Lady Finger plants.
- Enhanced soil fertility over time, reducing the need for additional fertilizers.
By following these care tips and harnessing the power of beneficial bacteria, you’ll ensure your Lady Finger plants are robust, healthy, and ready to produce a plentiful harvest. The next section will guide you through the exciting process of harvesting and utilizing your homegrown Lady Finger bounty.
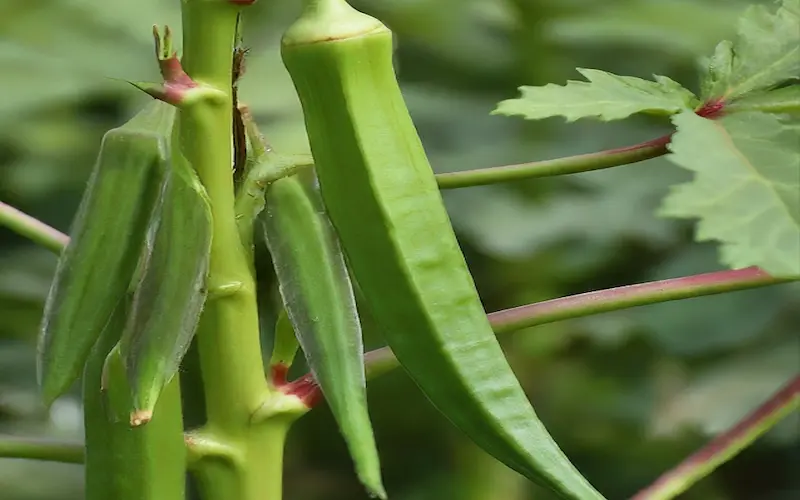
5. Harvesting and Usage
Harvesting Lady Finger
Timing
Harvest Lady Finger pods when they are about 3 to 4 inches long for the best flavor and tenderness.
Check the plants regularly, as pods mature quickly and should be harvested every 2-3 days.
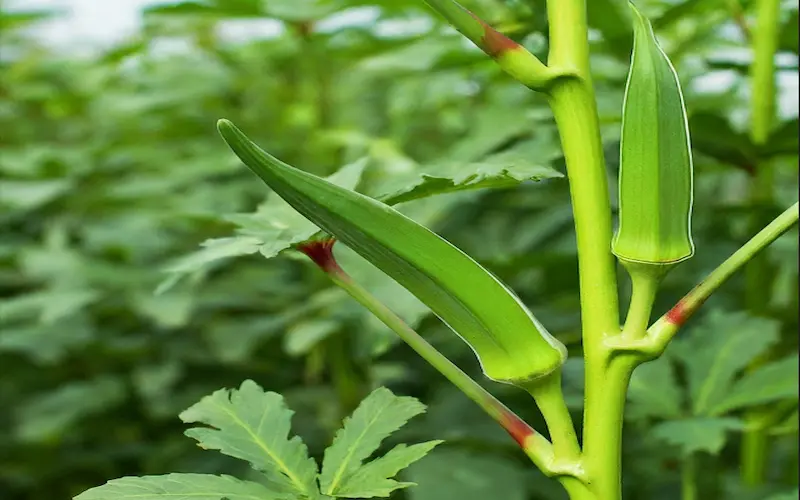
Technique:
Cut the pods off the plant with a knife or a pair of sharp garden shears, being careful not to cut the stem.
Harvesting regularly encourages continuous pod production throughout the growing season.
Handling:
Handle Lady Finger pods with care to avoid bruising or damaging the delicate skin.
Wear gloves if you have sensitive skin, as some varieties may have fine hairs that can cause irritation.
Using Your Lady Finger Harvest
Culinary Delight:
Lady Finger is a versatile vegetable that can be used in various culinary preparations.
Enjoy it in stir-fries, curries, soups, or as a crispy snack when lightly battered and fried. Preservation
Lady Finger can be frozen for future use. Blanche the pods briefly in boiling water, cool them rapidly, and then freeze in airtight containers.
Seed Saving:
If you’re interested in growing Lady Finger again, allow some pods to mature on the plant.
Harvest the mature pods, allow them to dry, and collect the seeds for planting in the next season.
Composting:
Don’t let any excess or discarded Lady Finger go to waste. Compost the unused parts to enrich your compost pile.
The Amazing Powers Of A Humble Bacterium
Nitrogen Fixation:
- Continue to benefit from the nitrogen-fixing bacteria in the soil even during the harvesting phase.
- The presence of these bacteria contributes to the overall health of your garden.
Sustainable Gardening:
- Embrace the sustainability of your home garden by recycling plant material back into the soil through composting.
By mastering the art of harvesting and utilizing your Lady Finger crop, you not only savor the fruits of your labor in the kitchen but also contribute to the ongoing health and fertility of your garden. In the final sections, we’ll explore additional tips, precautions, and the essential tools you’ll need for successful Lady Finger cultivation.
6. Additional Tips and Warnings
Tips for Successful Lady Finger Cultivation
Regular Inspections:
• Check your Lady Finger plants frequently for indications of pests, illnesses, or dietary deficiencies.
• Early detection promotes plant health by enabling timely intervention.
Staking:
- Provide support or staking for Lady Finger plants when they reach a height of 2-3 feet.
- This prevents bending or breaking of stems, especially when the plants are laden with pods.
Mulching:
- To prevent weed growth and preserve soil moisture, mulch the area surrounding Lady Finger plants with an organic layer.
- Mulching also helps to stabilize soil temperature, which is beneficial to the plants during temperature swings..
Precautions and Warnings
Pest Management:
- • Be aware of common pests such as spider mites, aphids, and whiteflies.
• To protect your plants, use organic pest control techniques like neem oil or insecticidal soap.
Disease Prevention:
- Practice crop rotation to reduce the risk of soil-borne diseases.
- Avoid overhead watering to minimize the spread of fungal diseases.
Companion Planting:
- Take advantage of companion planting to deter pests. Marigolds and basil, for example, can help repel nematodes.
Essential Tools for Lady Finger Cultivation
Garden Fork:
- Use a garden fork for soil preparation, ensuring it is loose and well-draining.
Garden Shears or Knife:
- Essential for clean and precise harvesting of Lady Finger pods.
Mulch:
- • Use organic mulch to control soil temperature, prevent weed growth, and preserve moisture.
Fertilizer:
- Choose a balanced fertilizer to provide essential nutrients for Lady Finger plants.
Stakes or Supports:
- Use stakes or other supports to prevent bending or breaking of Lady Finger stems.
Recap and Final Thoughts
As you embark on your Lady Finger cultivation journey, remember that attention to detail and consistent care are key to a successful harvest. Regular inspections, proper pest management, and the use of essential tools contribute to the overall health of your plants. By following these additional tips and warnings, you’ll navigate potential challenges and enjoy a thriving Lady Finger garden. In the final section, explore related topics and discover further resources to enhance your gardening expertise.
Conclusion
In conclusion, your journey into the world of growing Lady Finger (Bhindi) at home has been a rewarding exploration of the art and science of gardening. Armed with knowledge on soil preparation, planting, care, harvesting, and usage, you now possess the skills to nurture thriving Lady Finger plants. The additional tips, warnings, and essential tools provided ensure a comprehensive guide to overcome potential challenges.
As you savor the fruits of your labor in the kitchen, consider branching out into related topics like growing okra, companion planting, or crafting your own organic fertilizer. The diverse resources available allow you to deepen your understanding of sustainable and organic gardening practices. Your flourishing Lady Finger Garden is not just a testament to your green thumb but a source of fresh, nutritious produce and a sustainable contribution to the health of your garden. May your gardening adventures continue to blossom, and may each harvest bring joy and fulfillment. Happy gardening!


- Be Respectful
- Stay Relevant
- Stay Positive
- True Feedback
- Encourage Discussion
- Avoid Spamming
- No Fake News
- Don't Copy-Paste
- No Personal Attacks
- Be Respectful
- Stay Relevant
- Stay Positive
- True Feedback
- Encourage Discussion
- Avoid Spamming
- No Fake News
- Don't Copy-Paste
- No Personal Attacks
